
Q-modeling NIKE-X
Quote from Admin on January 6, 2024, 7:06 pmSome time ago, I was contacted by a woman (Susan) in Toms River about some rockets and rocket kits that she had. I met with her and I picked up a Q-modeling NIKE-X kit and a few other collector items.
When I opened the kit, I found most of the parts but a few were missing. This was odd as the kit was sealed. Missing were some laser cut parts needed to assemble the motor mount and fin cage assembly. These parts were also all cut from balsa. The motor mount was 24mm. Q-modeling closed up shop some time ago, so there was no way to get the missing parts. Never fear!
I decided that I'd prefer a 29mm motor mount in the NIKE-X permitting a broader choice of motors. Because the laser cut centering rings (CRs) were amiss, I had to design those myself. I also decided to cut everything from 3mm and 6mm plywood. You can see the pieces I'm referring to in am image I captured from the kit's instructions.
I meticulously measured all of the parts with my digital calipers and began drawing the components in Shapr3D. The CRs didn't exist for measurement, so I had to design those. I opted to not excise the material that was cut out of the original design. I also extended the fin tabs so that they could be glued to the motor mount tube for extra strength and support. When I had everything drawn, I exported the drawings as SVG files. SVG files are the preferred format to import into my xTool Creative Suite (XCS) software for my xTool laser.
There were two traditional centering rings in the kit which appear to have been laser cut from high density fiberboard. Because the kit was originally designed for a 24mm motor mount tube, I needed to enlarge the center bore of those two CRs. I measured them and laser engraved a piece of plywood the size of the outside diameter of these two CRs. This allowed me to insert the two CRs in a frame that would insure that the laser cut of the inner bore for a 29mm motor mount tube would be centered.
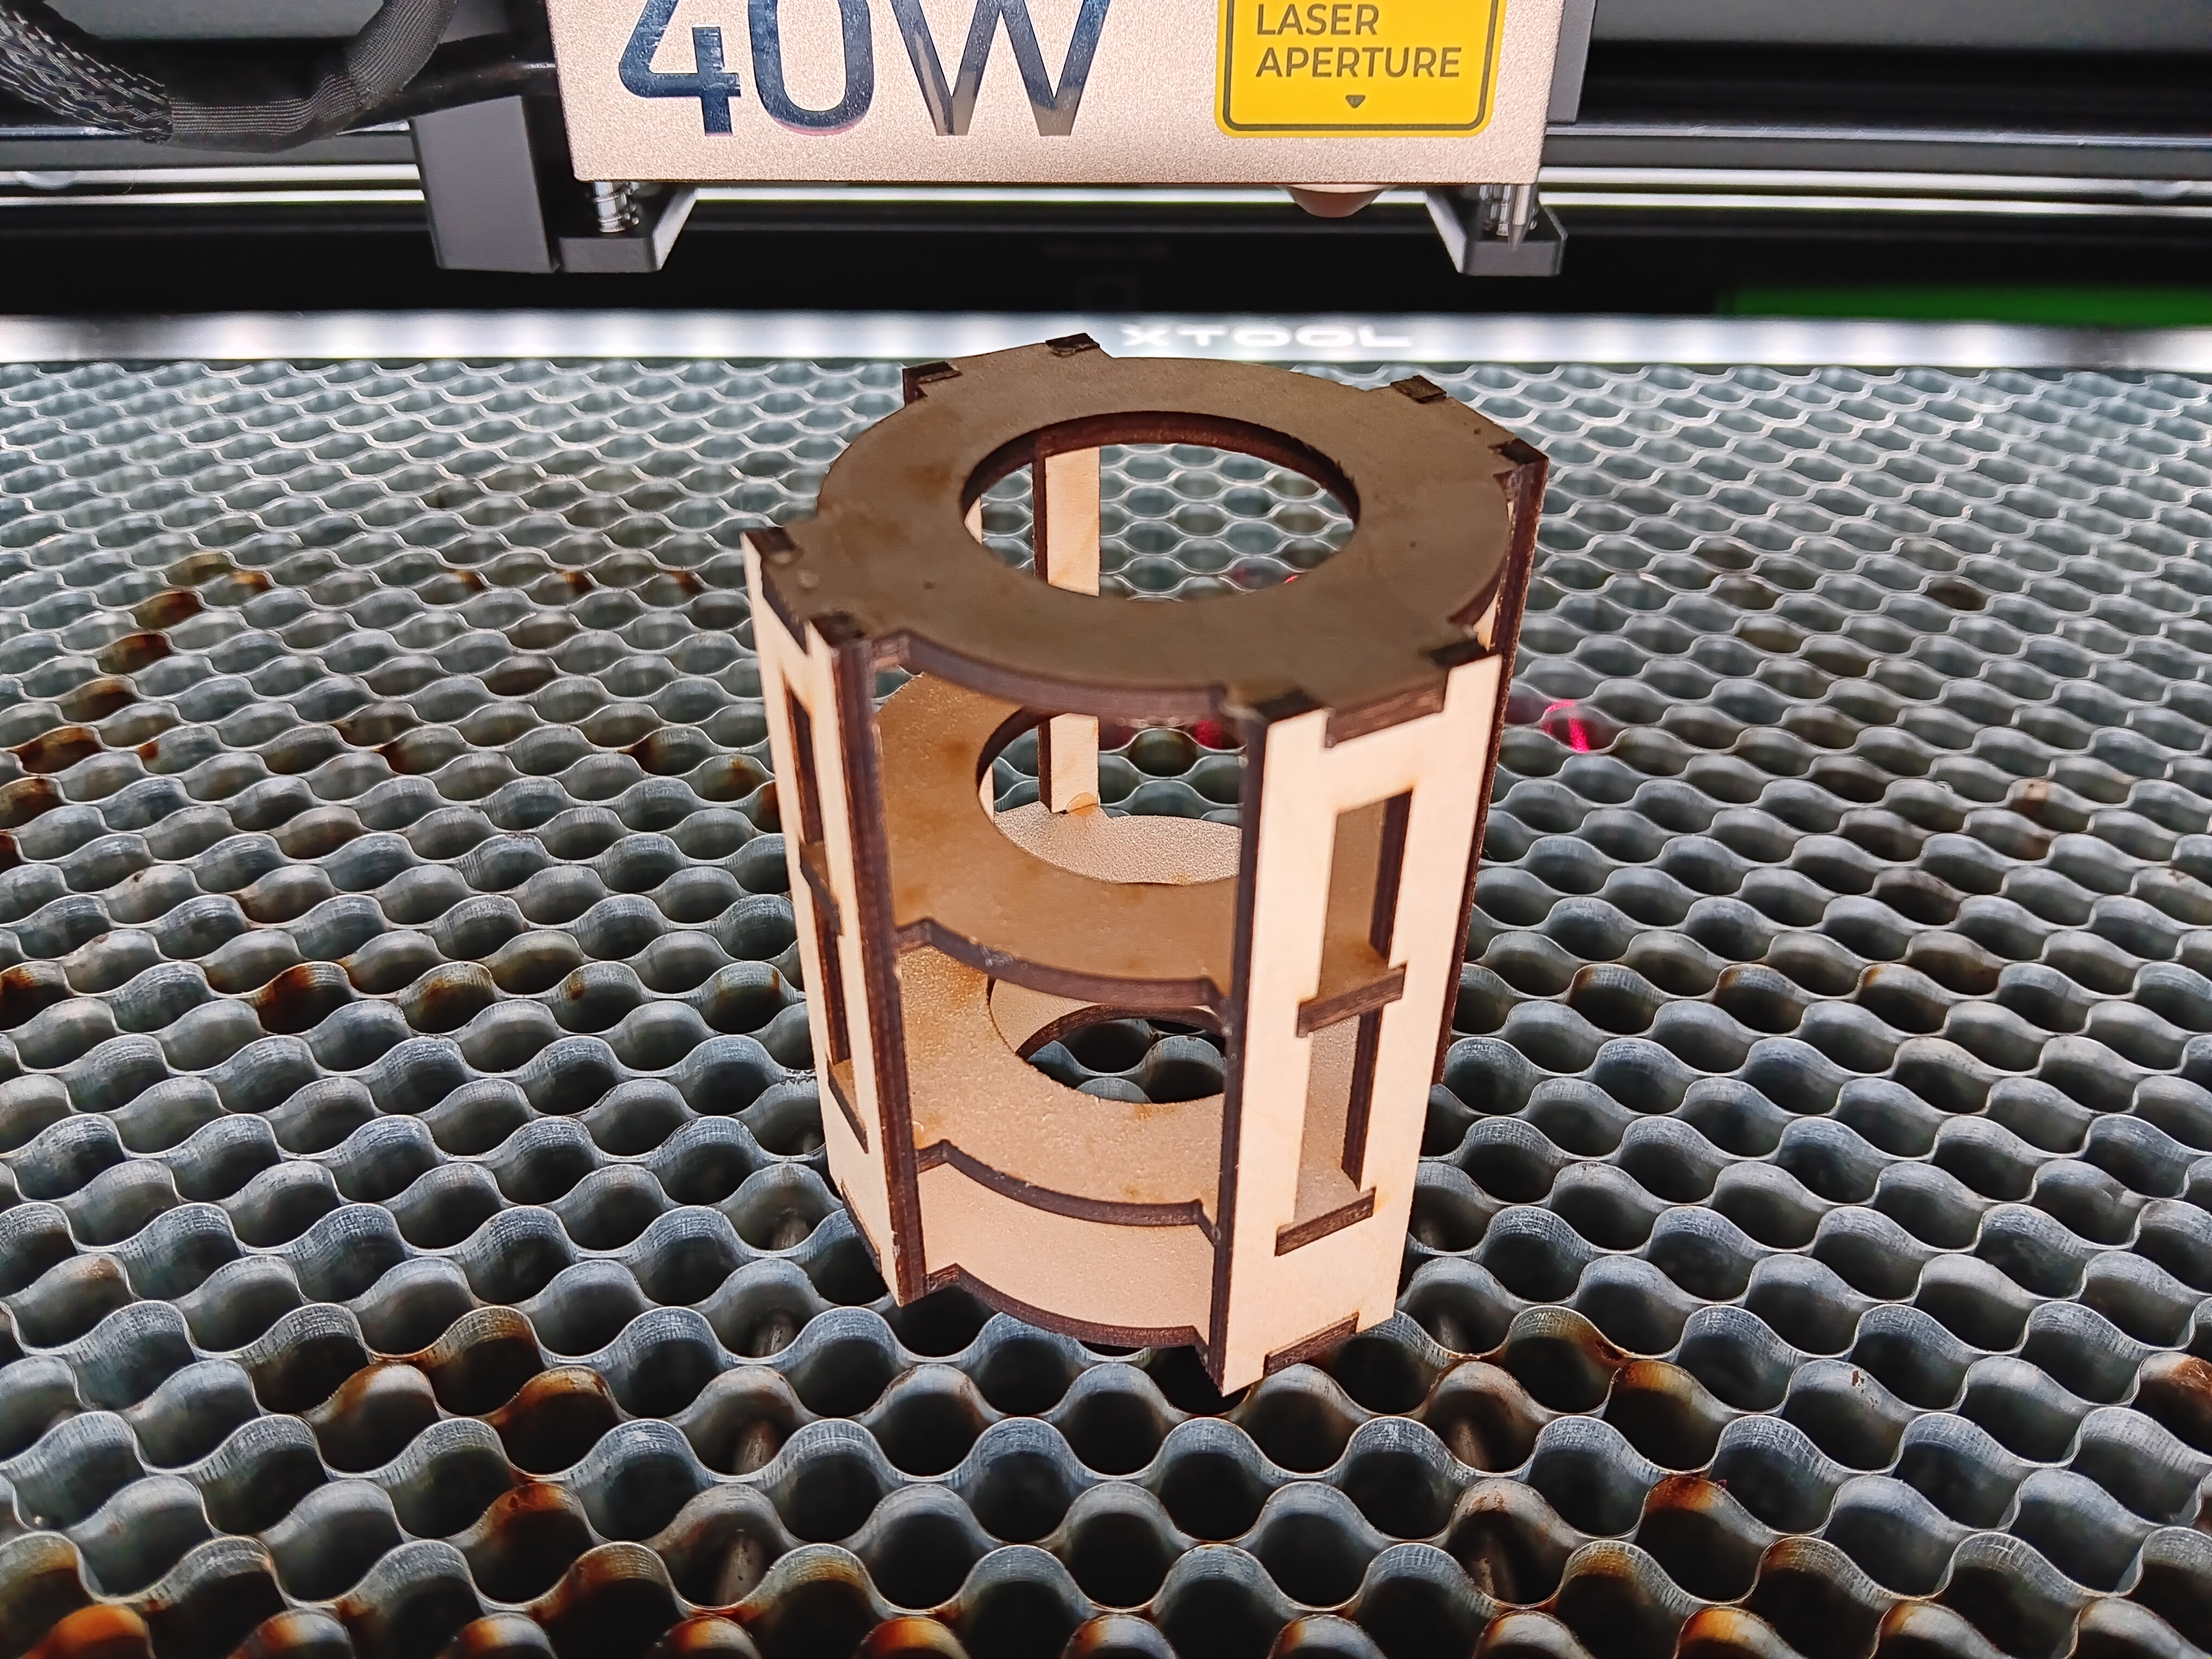
I assembled the motor mount/fin mount framework from the parts I designed a cut with the laser.
FYI, the laser beam's kerf is about 1/10 of a mm, so really tight tolerances can be realized.
Some time ago, I was contacted by a woman (Susan) in Toms River about some rockets and rocket kits that she had. I met with her and I picked up a Q-modeling NIKE-X kit and a few other collector items.
When I opened the kit, I found most of the parts but a few were missing. This was odd as the kit was sealed. Missing were some laser cut parts needed to assemble the motor mount and fin cage assembly. These parts were also all cut from balsa. The motor mount was 24mm. Q-modeling closed up shop some time ago, so there was no way to get the missing parts. Never fear!
I decided that I'd prefer a 29mm motor mount in the NIKE-X permitting a broader choice of motors. Because the laser cut centering rings (CRs) were amiss, I had to design those myself. I also decided to cut everything from 3mm and 6mm plywood. You can see the pieces I'm referring to in am image I captured from the kit's instructions.
I meticulously measured all of the parts with my digital calipers and began drawing the components in Shapr3D. The CRs didn't exist for measurement, so I had to design those. I opted to not excise the material that was cut out of the original design. I also extended the fin tabs so that they could be glued to the motor mount tube for extra strength and support. When I had everything drawn, I exported the drawings as SVG files. SVG files are the preferred format to import into my xTool Creative Suite (XCS) software for my xTool laser.
There were two traditional centering rings in the kit which appear to have been laser cut from high density fiberboard. Because the kit was originally designed for a 24mm motor mount tube, I needed to enlarge the center bore of those two CRs. I measured them and laser engraved a piece of plywood the size of the outside diameter of these two CRs. This allowed me to insert the two CRs in a frame that would insure that the laser cut of the inner bore for a 29mm motor mount tube would be centered.
I assembled the motor mount/fin mount framework from the parts I designed a cut with the laser.
FYI, the laser beam's kerf is about 1/10 of a mm, so really tight tolerances can be realized.
Uploaded files: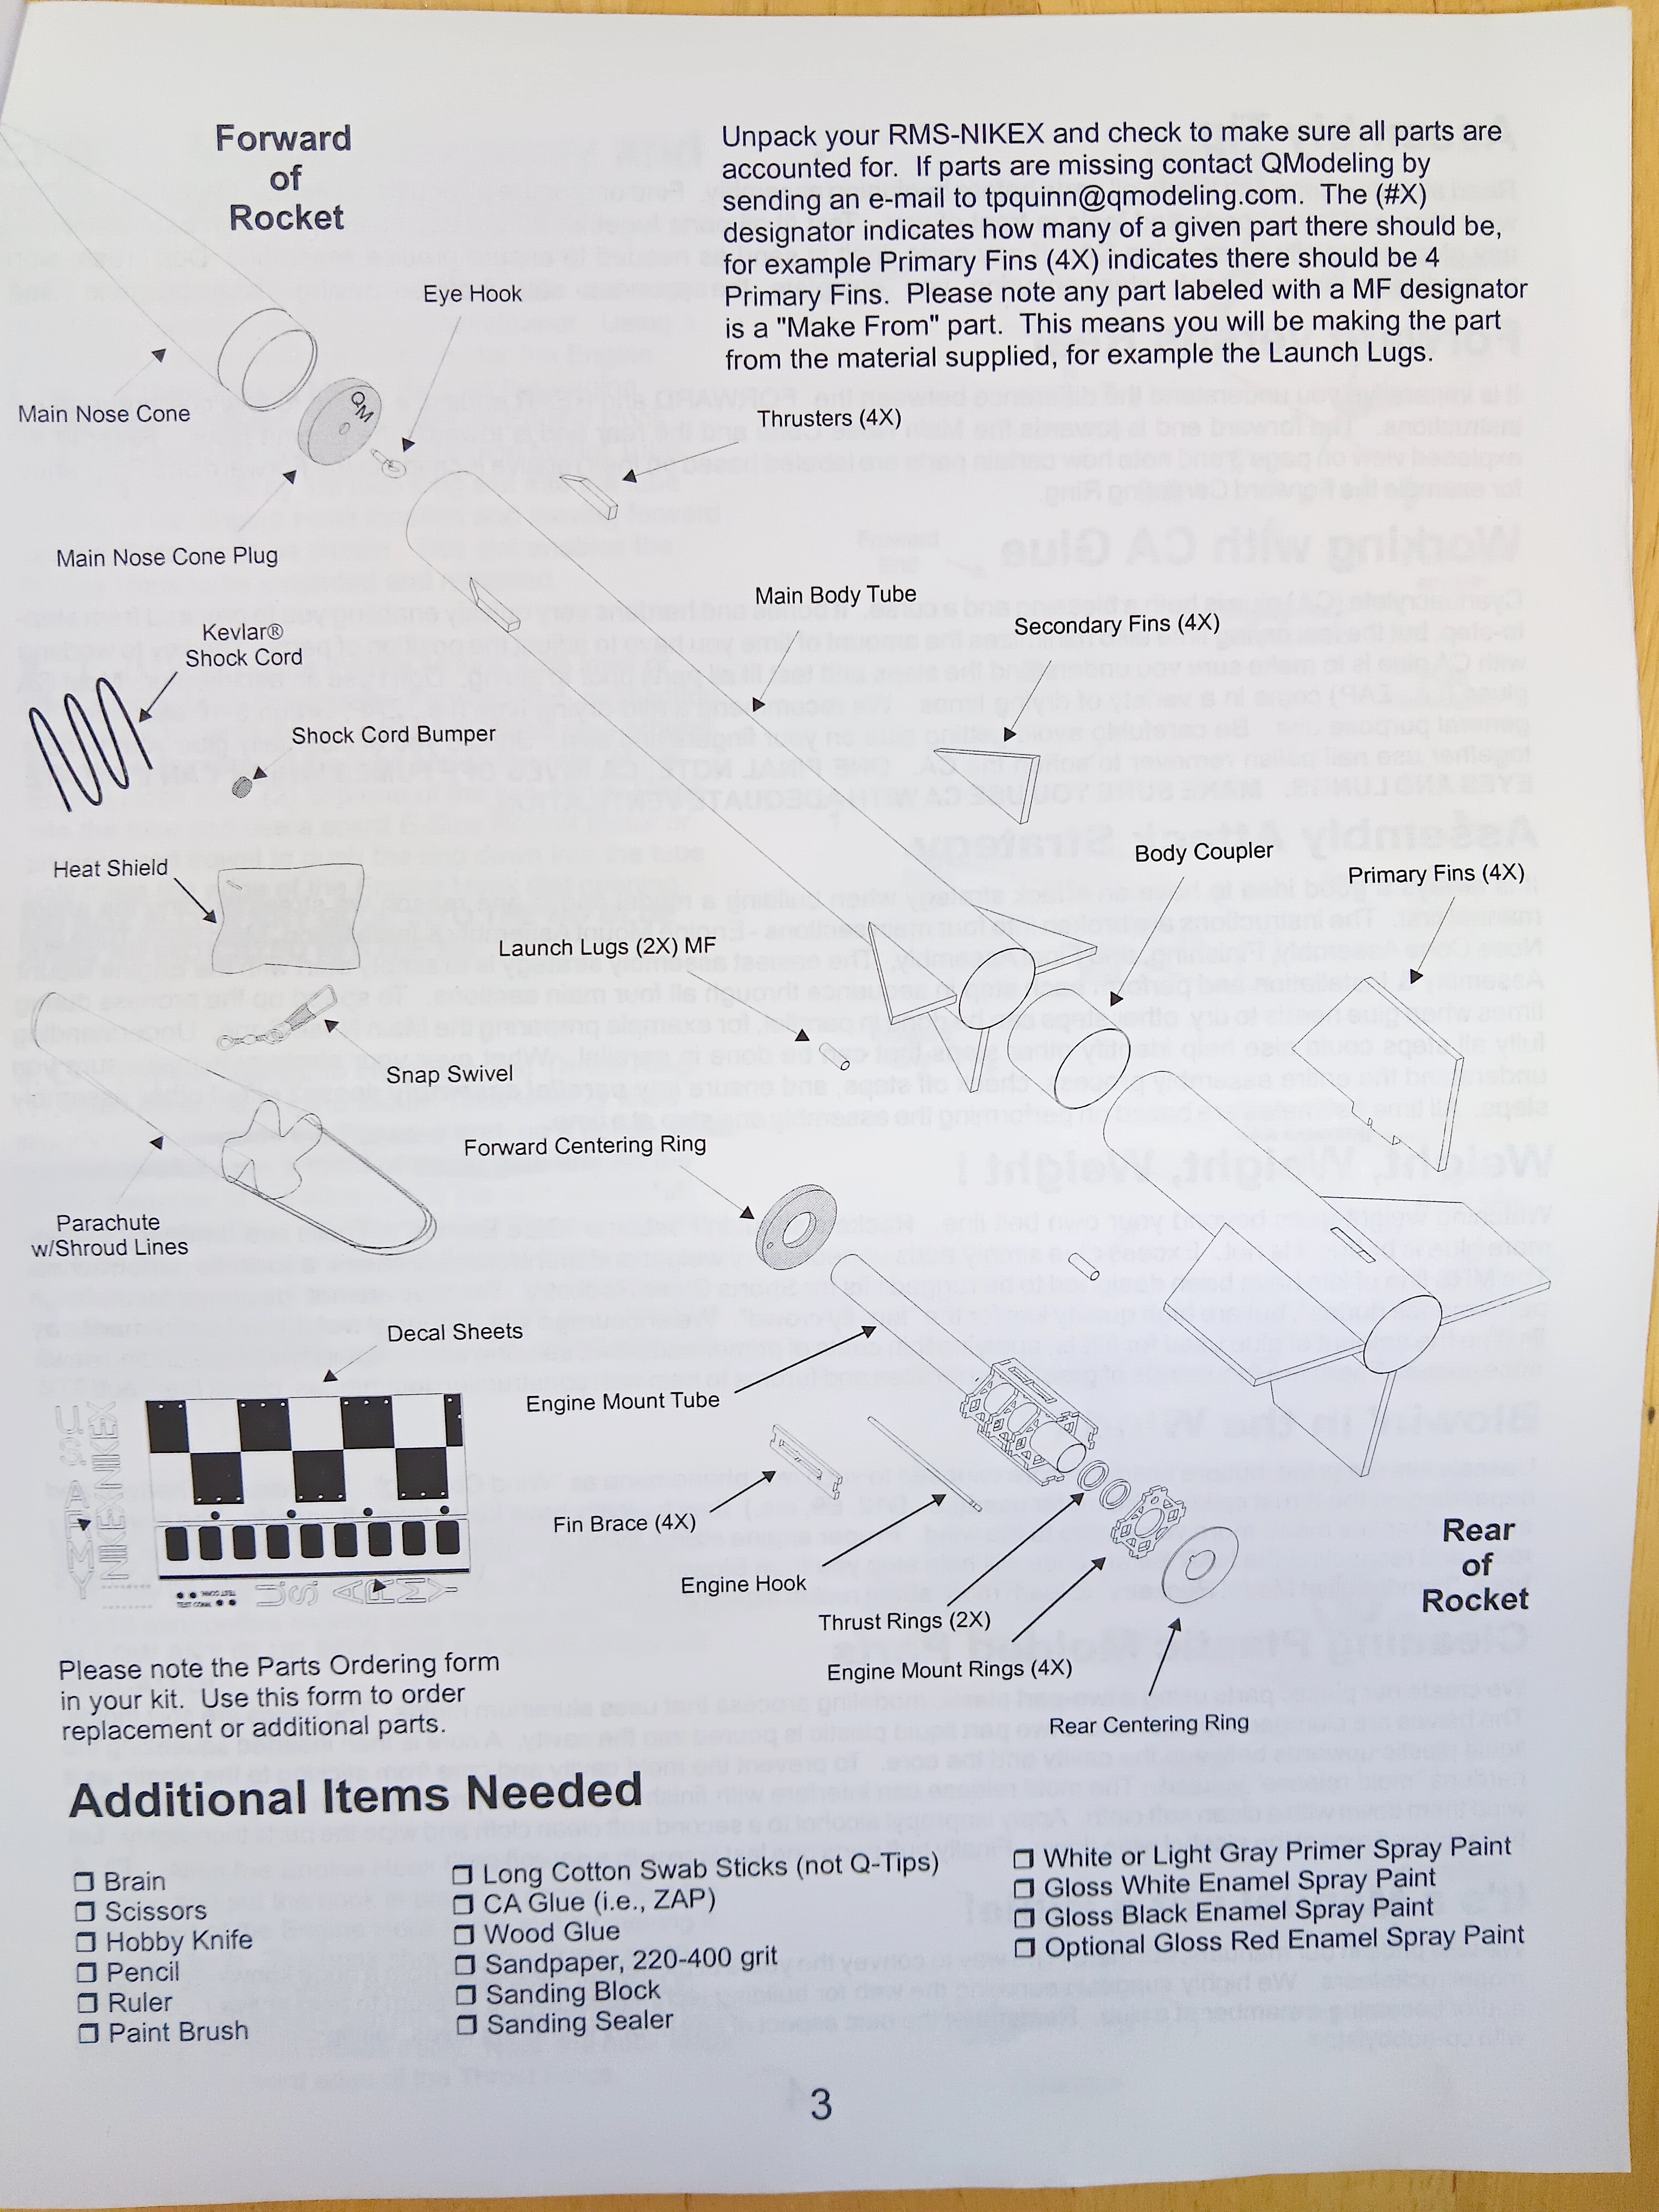

Quote from Admin on January 10, 2024, 3:32 pmI redesign the Q-Modeling parts in Shapr3D. Shapr3D allows exporting the design files as .DXF (Design eXchange Format) which I can then import into xTool's XCS. I ordered up 3mm and 6mm basswood plywood and laser cut all of the modifies and new components. It's ready to go save for the motor mount tube (MMT) which I upsized to a 29mm MMT over the original 24mm MMT.
Anyway, because I did this all in Shapr3D, I was able to export build step images and I created a short video showing how the whole design goes together. I've had rockets with canard fins and, in most cases, they were surface mounted. I decides to incorporate a fin assembly for the canards that would make them much sturdier. IT also strengthens the overall airframe by coupling the upper part to the MMT.
Anyway, for your enjoyment...
https://youtu.be/eKh6HBeF7ag
I redesign the Q-Modeling parts in Shapr3D. Shapr3D allows exporting the design files as .DXF (Design eXchange Format) which I can then import into xTool's XCS. I ordered up 3mm and 6mm basswood plywood and laser cut all of the modifies and new components. It's ready to go save for the motor mount tube (MMT) which I upsized to a 29mm MMT over the original 24mm MMT.
Anyway, because I did this all in Shapr3D, I was able to export build step images and I created a short video showing how the whole design goes together. I've had rockets with canard fins and, in most cases, they were surface mounted. I decides to incorporate a fin assembly for the canards that would make them much sturdier. IT also strengthens the overall airframe by coupling the upper part to the MMT.
Anyway, for your enjoyment...
Quote from Ken Golomb on January 10, 2024, 4:13 pmYou just make it seem so easy....that Laser Cutter seems like a spectacular tool to have.
(As I just manually sawed some fins out for my latest build...I won't post a video!!)
You just make it seem so easy....that Laser Cutter seems like a spectacular tool to have.
(As I just manually sawed some fins out for my latest build...I won't post a video!!)
Quote from Admin on January 10, 2024, 6:07 pmQuote from Ken Golomb on January 10, 2024, 4:13 pmYou just make it seem so easy....that Laser Cutter seems like a spectacular tool to have.
(As I just manually sawed some fins out for my latest build...I won't post a video!!)I don't know that it's all that easy but it's certainly a lot of fun! 😉
I purchased Shapr3D shortly after I picked up my 3D printer. I've been using it for design work for the 3D printer but it's also been great to help visualize other projects. I've used it for woodwork projects with my router table, table saw and mitre saw as well as projects I've milled on my milling machine. None of those things have digital control, but being able to workout details and visualize a project before cutting any material is a godsend.
For the laser, all that's really needed is line art. Shapr3D can output 3D model information to other CAD applications in X_T, X_B, STEP, IGES, etc. It outputs 3MF or STL for 3D printing. It can create technical drawings and output those in DWG, DXF and PDF and project sketches in DWG, DXF and SVG. For that video, I used Shapr3D which can output JPG and PNG visualizations, and those components in the visualization can have material, environmental and camera attributes. In fact, for the wood pieces, I set their material attributes to be sanded basswood. It might not be readily visible in the video but there's woodgrain patterning on those components.
Laser cutting is really nice. I've wanted a laser for a long time and back in October, when xTool finally released their S1, I bought one due to the introductory deals they offered with it. For the holidays, I laser etched mugs, whiskey bottles and cookie tins for present. I also laser etched slate coasters for CENJARS members. The only issue with laser cutting is the need to exhaust smoke and gasses. I needed to buy an additional length of exhaust hose before I could use the laser.
Quote from Ken Golomb on January 10, 2024, 4:13 pmYou just make it seem so easy....that Laser Cutter seems like a spectacular tool to have.
(As I just manually sawed some fins out for my latest build...I won't post a video!!)
I don't know that it's all that easy but it's certainly a lot of fun! 😉
I purchased Shapr3D shortly after I picked up my 3D printer. I've been using it for design work for the 3D printer but it's also been great to help visualize other projects. I've used it for woodwork projects with my router table, table saw and mitre saw as well as projects I've milled on my milling machine. None of those things have digital control, but being able to workout details and visualize a project before cutting any material is a godsend.
For the laser, all that's really needed is line art. Shapr3D can output 3D model information to other CAD applications in X_T, X_B, STEP, IGES, etc. It outputs 3MF or STL for 3D printing. It can create technical drawings and output those in DWG, DXF and PDF and project sketches in DWG, DXF and SVG. For that video, I used Shapr3D which can output JPG and PNG visualizations, and those components in the visualization can have material, environmental and camera attributes. In fact, for the wood pieces, I set their material attributes to be sanded basswood. It might not be readily visible in the video but there's woodgrain patterning on those components.
Laser cutting is really nice. I've wanted a laser for a long time and back in October, when xTool finally released their S1, I bought one due to the introductory deals they offered with it. For the holidays, I laser etched mugs, whiskey bottles and cookie tins for present. I also laser etched slate coasters for CENJARS members. The only issue with laser cutting is the need to exhaust smoke and gasses. I needed to buy an additional length of exhaust hose before I could use the laser.
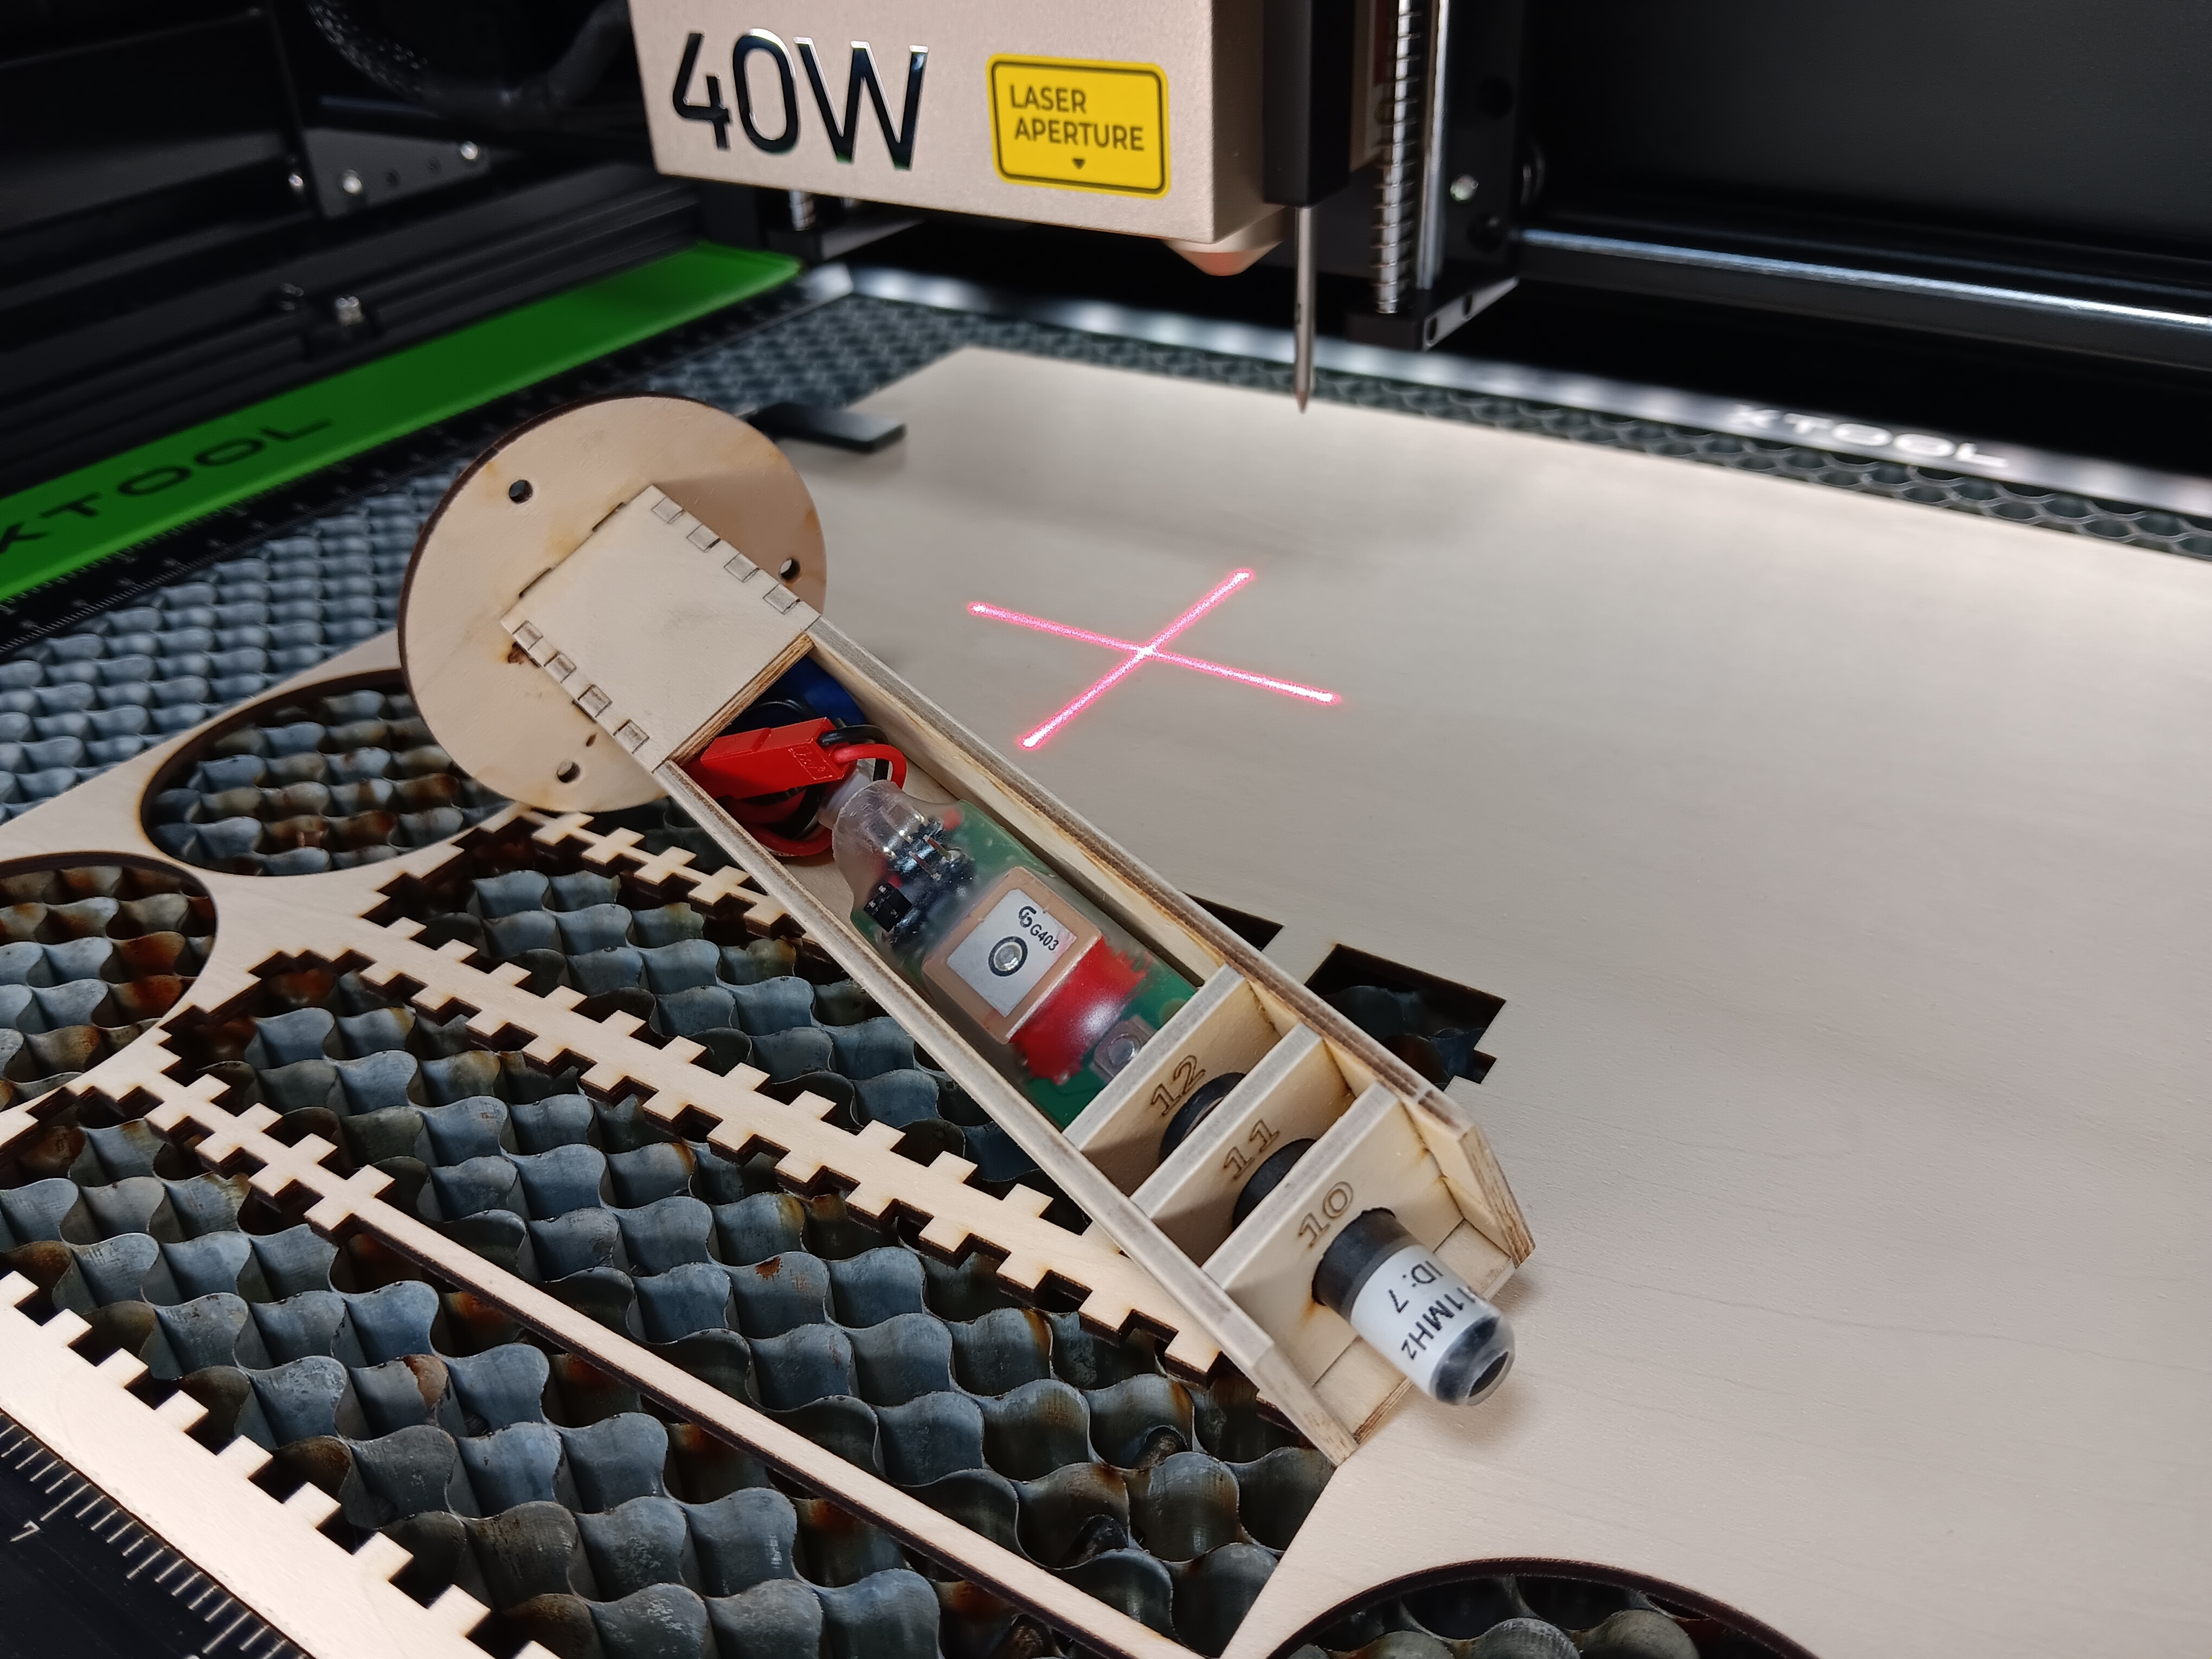
Quote from Admin on January 14, 2024, 1:17 pmFor my Nike-X, I will want to have GPS tracking available. I devised an av-bay for its nosecone to hold my EggTimer Rocketry EggFinder Mini. Of course, it's laser cut from 3mm (⅛ inch) basswood plywood.
For my Nike-X, I will want to have GPS tracking available. I devised an av-bay for its nosecone to hold my EggTimer Rocketry EggFinder Mini. Of course, it's laser cut from 3mm (⅛ inch) basswood plywood.
Uploaded files: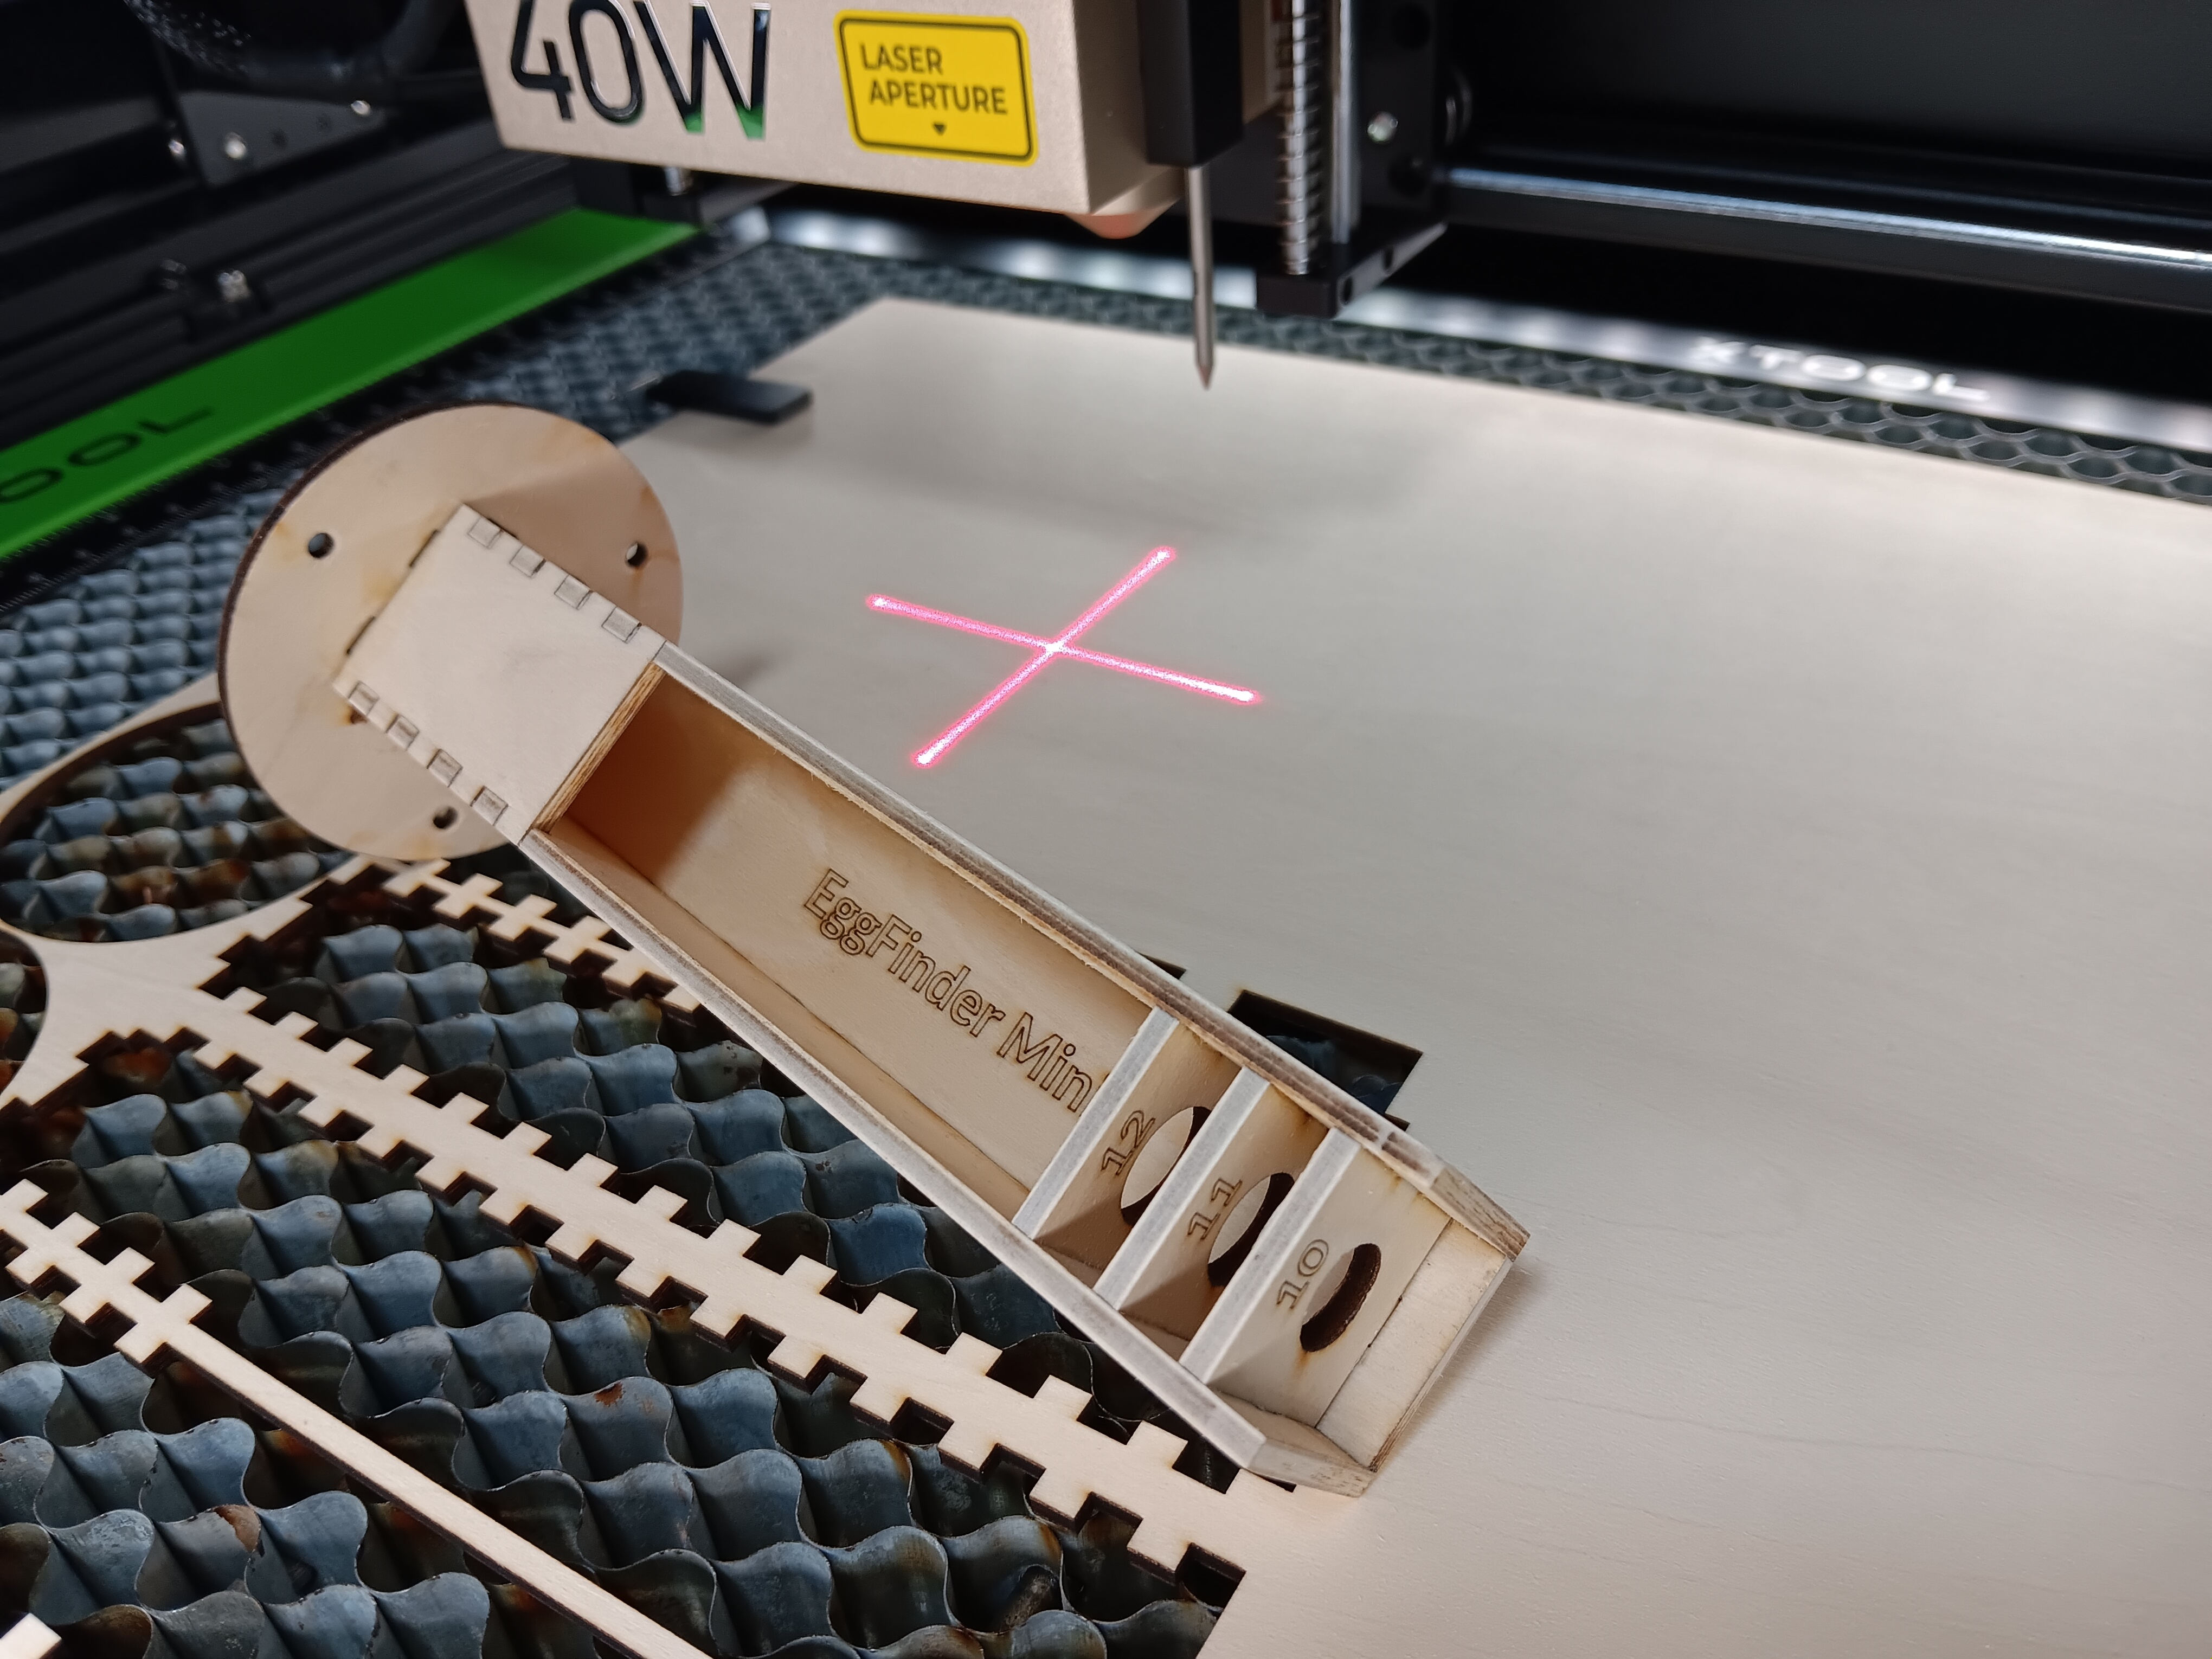
Quote from Eric Becher on January 14, 2024, 6:29 pmKeep showing those laser pics & videos. I'll have one of those things before the end of this year! 😂
Keep showing those laser pics & videos. I'll have one of those things before the end of this year! 😂
Quote from Admin on January 23, 2024, 2:53 pmGuess what I found yesterday? When I first met with Susan at her new home in Toms River, I purchase one of the Q-Modeling kits as well as an Estes Atlas kit. She gave me some boxes that had miscellaneous bits of tubing, paint, and sundry other rocketry bits. Mostly, they looked like boxes of scraps her fiancé had left from building his rockets.
I recently purchased a Radical Rocketry Thunderbird 3 kit which is just the 3D printed bits. The modeler must supply his or her own tubes (BT50, BT60 and BT80 sizes). I had ample BT50 and, oddly, BT80 tubes in my parts cache but I didn't have any BT60s. I need a 21cm piece. Yesterday, I went into the garage where I put the box I got from Susan and started looking through it. No BT60 tubing; at least, not a piece long enough. However, I found a zip-lock baggie which held the balsa pieces that I found bidding in my Q-Modeling Nike-X kit. Oh well, I like the pieces I cut from 3mm and 6mm basswood plywood, so I won't be using those bits. Her fiancé Erik had pieces of rocket all over the place.
Guess what I found yesterday? When I first met with Susan at her new home in Toms River, I purchase one of the Q-Modeling kits as well as an Estes Atlas kit. She gave me some boxes that had miscellaneous bits of tubing, paint, and sundry other rocketry bits. Mostly, they looked like boxes of scraps her fiancé had left from building his rockets.
I recently purchased a Radical Rocketry Thunderbird 3 kit which is just the 3D printed bits. The modeler must supply his or her own tubes (BT50, BT60 and BT80 sizes). I had ample BT50 and, oddly, BT80 tubes in my parts cache but I didn't have any BT60s. I need a 21cm piece. Yesterday, I went into the garage where I put the box I got from Susan and started looking through it. No BT60 tubing; at least, not a piece long enough. However, I found a zip-lock baggie which held the balsa pieces that I found bidding in my Q-Modeling Nike-X kit. Oh well, I like the pieces I cut from 3mm and 6mm basswood plywood, so I won't be using those bits. Her fiancé Erik had pieces of rocket all over the place.
Quote from Eric Becher on January 25, 2024, 9:03 pmIn one of the boxes I got from Susan I found a fin from the V-2 kit she had, that I did not buy. I saved the fin and will return it to her when I see her next. Or if anyone of us does buy it, I'll pass it on.
In one of the boxes I got from Susan I found a fin from the V-2 kit she had, that I did not buy. I saved the fin and will return it to her when I see her next. Or if anyone of us does buy it, I'll pass it on.