Rocket Paint
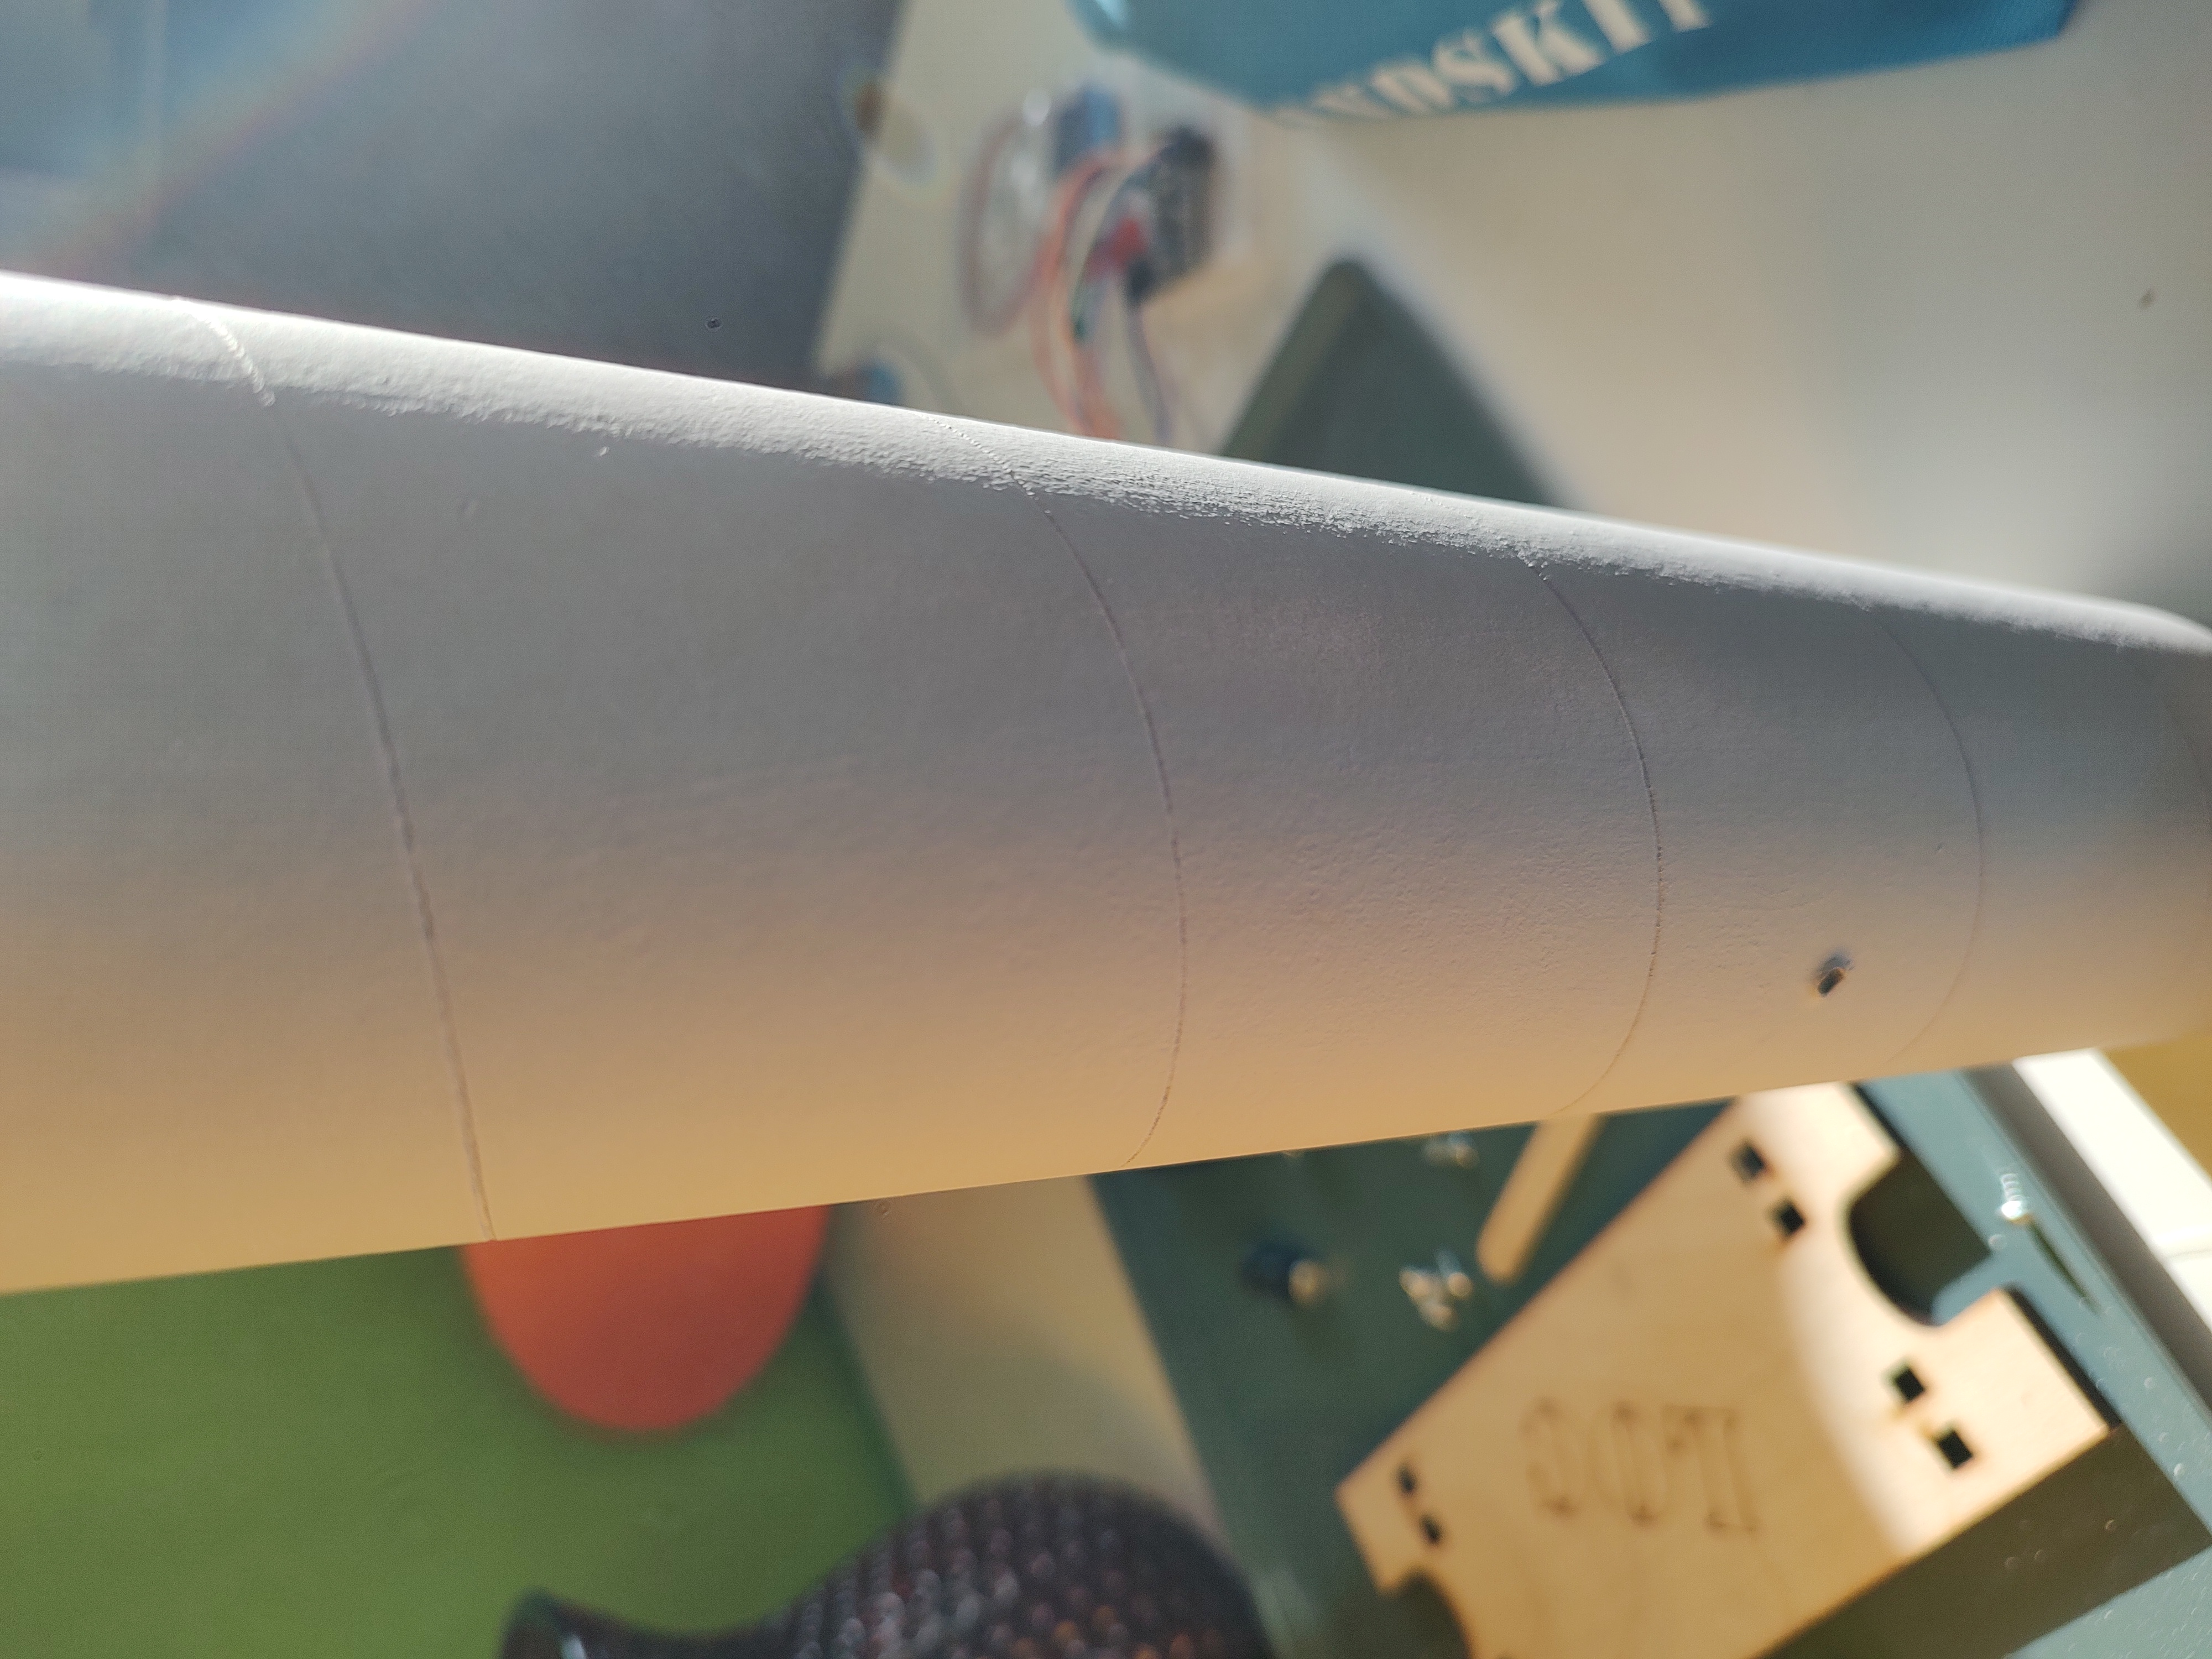
Quote from koushh on April 25, 2024, 6:21 pmDuring painting, ow to remove round marks from the body tube ? We tried automotive filler primer and surface primer but no result. Any suggestion please.
During painting, ow to remove round marks from the body tube ? We tried automotive filler primer and surface primer but no result. Any suggestion please.
Uploaded files:Quote from Ckirlew on April 25, 2024, 6:56 pmIf the spirals are deep, then you need to use a wood filler and sand it down. You may need to do it several times.
The auto filler primer works well on shallow spirals, but you still need to paint it, sand it down, and repaint it. Make need several coats.
Sand, fill, sand fill, sand, fill. Repeat!
If the spirals are deep, then you need to use a wood filler and sand it down. You may need to do it several times.
The auto filler primer works well on shallow spirals, but you still need to paint it, sand it down, and repaint it. Make need several coats.
Sand, fill, sand fill, sand, fill. Repeat!
Quote from Eric Becher on April 25, 2024, 7:33 pmAs Charlie said. I have used just primer, sand, primer, etc., and it can take a few coats minimum. You can use somewhat heavy coats since you will be sanding any sags off, but don't get too carried away or it won't dry well.
If the grooves are deep, filler as Charlie said. I like to use Minwax wood filler that comes in a tube (any color you like, from Home Depot or Lowes). It is a smooth, soft consistency like toothpaste. Squeeze it out onto the grooves, then run a putty knife over it (some people use a credit card-like piece of plastic) to push it down and remove the excess, plus spread it into other groove areas. When dry, sand it until almost all gone, with just the grooves filled with the filler. Helps if you have the sandpaper on a block or flat piece of wood so you aren't digging into the grooves like would happen if it was just in your hand. Then a couple of coats of primer should do the job. On rare occasions I have had to touch up with a second coat of filler.
BTW, the filler can also be spread over the fins to hide the wood grain (spread thin with the putty knife, then sand). I sometimes also use it to smooth out edges on fins, or uneven fillets. Still might take a coat of two of primer, but the results are better.
And yes - you can put the filler over the primer you already have on it. Just make sure there is no dust on it before you start filling. It can be hard to see the grooves sometimes, until you prime it. Then everything shows! No problem, just touch it up and sand smooth before the next coat.
Most of all - have patience. It may seem like a lot of work, but it isn't terribly difficult. Just takes time. When you see the smooth finished paint, you'll know it was worth the time spent. Good luck, and I want to see how it comes out when you're done!
As Charlie said. I have used just primer, sand, primer, etc., and it can take a few coats minimum. You can use somewhat heavy coats since you will be sanding any sags off, but don't get too carried away or it won't dry well.
If the grooves are deep, filler as Charlie said. I like to use Minwax wood filler that comes in a tube (any color you like, from Home Depot or Lowes). It is a smooth, soft consistency like toothpaste. Squeeze it out onto the grooves, then run a putty knife over it (some people use a credit card-like piece of plastic) to push it down and remove the excess, plus spread it into other groove areas. When dry, sand it until almost all gone, with just the grooves filled with the filler. Helps if you have the sandpaper on a block or flat piece of wood so you aren't digging into the grooves like would happen if it was just in your hand. Then a couple of coats of primer should do the job. On rare occasions I have had to touch up with a second coat of filler.
BTW, the filler can also be spread over the fins to hide the wood grain (spread thin with the putty knife, then sand). I sometimes also use it to smooth out edges on fins, or uneven fillets. Still might take a coat of two of primer, but the results are better.
And yes - you can put the filler over the primer you already have on it. Just make sure there is no dust on it before you start filling. It can be hard to see the grooves sometimes, until you prime it. Then everything shows! No problem, just touch it up and sand smooth before the next coat.
Most of all - have patience. It may seem like a lot of work, but it isn't terribly difficult. Just takes time. When you see the smooth finished paint, you'll know it was worth the time spent. Good luck, and I want to see how it comes out when you're done!
Uploaded files:Quote from Admin on April 25, 2024, 8:38 pmQuote from koushh on April 25, 2024, 6:21 pmDuring painting, ow to remove round marks from the body tube ? We tried automotive filler primer and surface primer but no result. Any suggestion please.
Which or what surface primer?
Bondo spot filler is usually sufficient for tube spirals. Apply with a putty knife and smooth it out along the spiral. Allow it to cure and sand.
High build filler primer (Duplicolor, Rustoleum or any other available brand) after the spirals have been filled.
When filling with the Bondo or a filler primer, most of what is applied is sanded away. The result is to leave as smooth a surface as possible. When satisfied with the surface, a paint primer coat (white primer for light colors and gray for darker colors) will prep the surface for the paint.
Painting paper requires that you sand carefully so as NOT to pull up the paper when the sanding.
Quote from koushh on April 25, 2024, 6:21 pmDuring painting, ow to remove round marks from the body tube ? We tried automotive filler primer and surface primer but no result. Any suggestion please.
Which or what surface primer?
Bondo spot filler is usually sufficient for tube spirals. Apply with a putty knife and smooth it out along the spiral. Allow it to cure and sand.
High build filler primer (Duplicolor, Rustoleum or any other available brand) after the spirals have been filled.
When filling with the Bondo or a filler primer, most of what is applied is sanded away. The result is to leave as smooth a surface as possible. When satisfied with the surface, a paint primer coat (white primer for light colors and gray for darker colors) will prep the surface for the paint.
Painting paper requires that you sand carefully so as NOT to pull up the paper when the sanding.
Quote from tjkopena on May 1, 2024, 3:20 pmAn additional note that's not obvious: Typically you would start with coarse sandpaper and then as you proceed through layers of filling & sanding, switch to finer sandpaper. For a big rocket with deep spirals that I was treating with putty filler, I'd start around 220 grit. On subsequent layers or filler primer I'd use 320 grit. For the last layers of color primer I'd use 400 grit. Use 1000 grit or finer to polish gloss clear coats for a real shine. The grit ratings are not a well defined standard, so it's a bit subjective & varies between brands, but those are common numbers to look for.
My personal rough guideline for how many layers you're looking at for a smooth finish:
- Small rockets (up to about BT-25): One or two iterations of filler primer & sand, one layer color primer, then two-ish layers of color.
- Medium rockets (up to ~BT-60) and shallow spirals: Three iterations of filler primer & sand, one layer color primer, then two layers of color.
- Larger rockets or deep spirals: Wood filler over the spirals and sanded down, one or two iterations of filler primer & sand, one layer color primer and sand, another layer color primer, then two or three layers of color.
As an example, going from this:
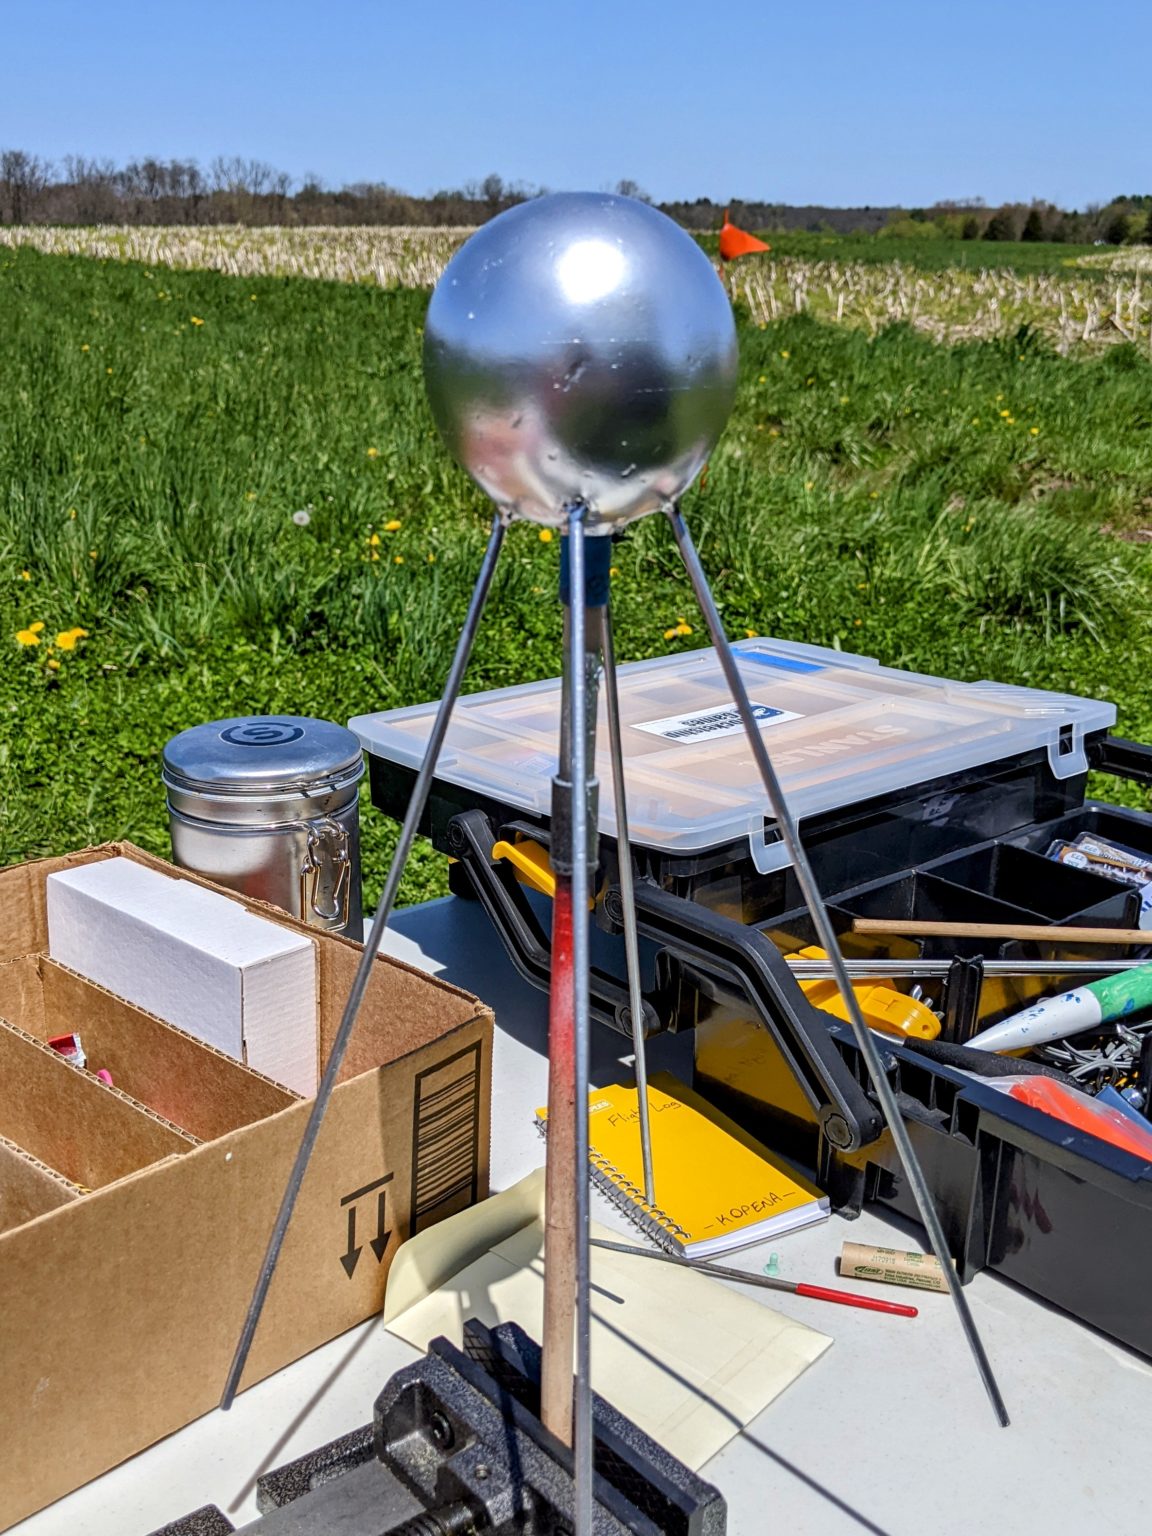
To this:
Took:
- Coat of Modg-Podg and sand
- Coat of carpenter’s wood filler and sand
- Coat of carpenter’s wood filler and sand
- Filler primer spray and sand
- Filler primer spray and sand
- Black primer spray
- Black primer spray
- Metallic chrome spray
- Metallic chrome spray
An additional note that's not obvious: Typically you would start with coarse sandpaper and then as you proceed through layers of filling & sanding, switch to finer sandpaper. For a big rocket with deep spirals that I was treating with putty filler, I'd start around 220 grit. On subsequent layers or filler primer I'd use 320 grit. For the last layers of color primer I'd use 400 grit. Use 1000 grit or finer to polish gloss clear coats for a real shine. The grit ratings are not a well defined standard, so it's a bit subjective & varies between brands, but those are common numbers to look for.
My personal rough guideline for how many layers you're looking at for a smooth finish:
- Small rockets (up to about BT-25): One or two iterations of filler primer & sand, one layer color primer, then two-ish layers of color.
- Medium rockets (up to ~BT-60) and shallow spirals: Three iterations of filler primer & sand, one layer color primer, then two layers of color.
- Larger rockets or deep spirals: Wood filler over the spirals and sanded down, one or two iterations of filler primer & sand, one layer color primer and sand, another layer color primer, then two or three layers of color.
As an example, going from this:

To this:

Took:
- Coat of Modg-Podg and sand
- Coat of carpenter’s wood filler and sand
- Coat of carpenter’s wood filler and sand
- Filler primer spray and sand
- Filler primer spray and sand
- Black primer spray
- Black primer spray
- Metallic chrome spray
- Metallic chrome spray


