Booster 6 dual deployment
Quote from oliverhub on August 9, 2026, 9:11 pmOK, so my first attempt at dual deployment (DD) was 100% successful except the main parachute appears not to have been connected to the nose cone or anything else. In fact, it was nowhere to be found. The rocket landed hard but thanks to the 6' mylar streamer it was visible to the ground. The streamer was motor deploy just past apogee. No damage to the airframe or electronics. Eggtimer Quark fired main at 500' as programed, and reported apogee of 844'. The 2 altimeters were similar. JL said 865' so I will use that for reference. I was certain when I prepped the rocket Saturday night, I had packed a 24" chute and connected it with a fishing tackle style swivel clip. The nomex wrap was tied to the same loop with kevlar thread. On the ground I found the rocket and both shock cords fully extended, nomex opened, but no parachute. Thoughts on main deployment stress factors would be appreciated.
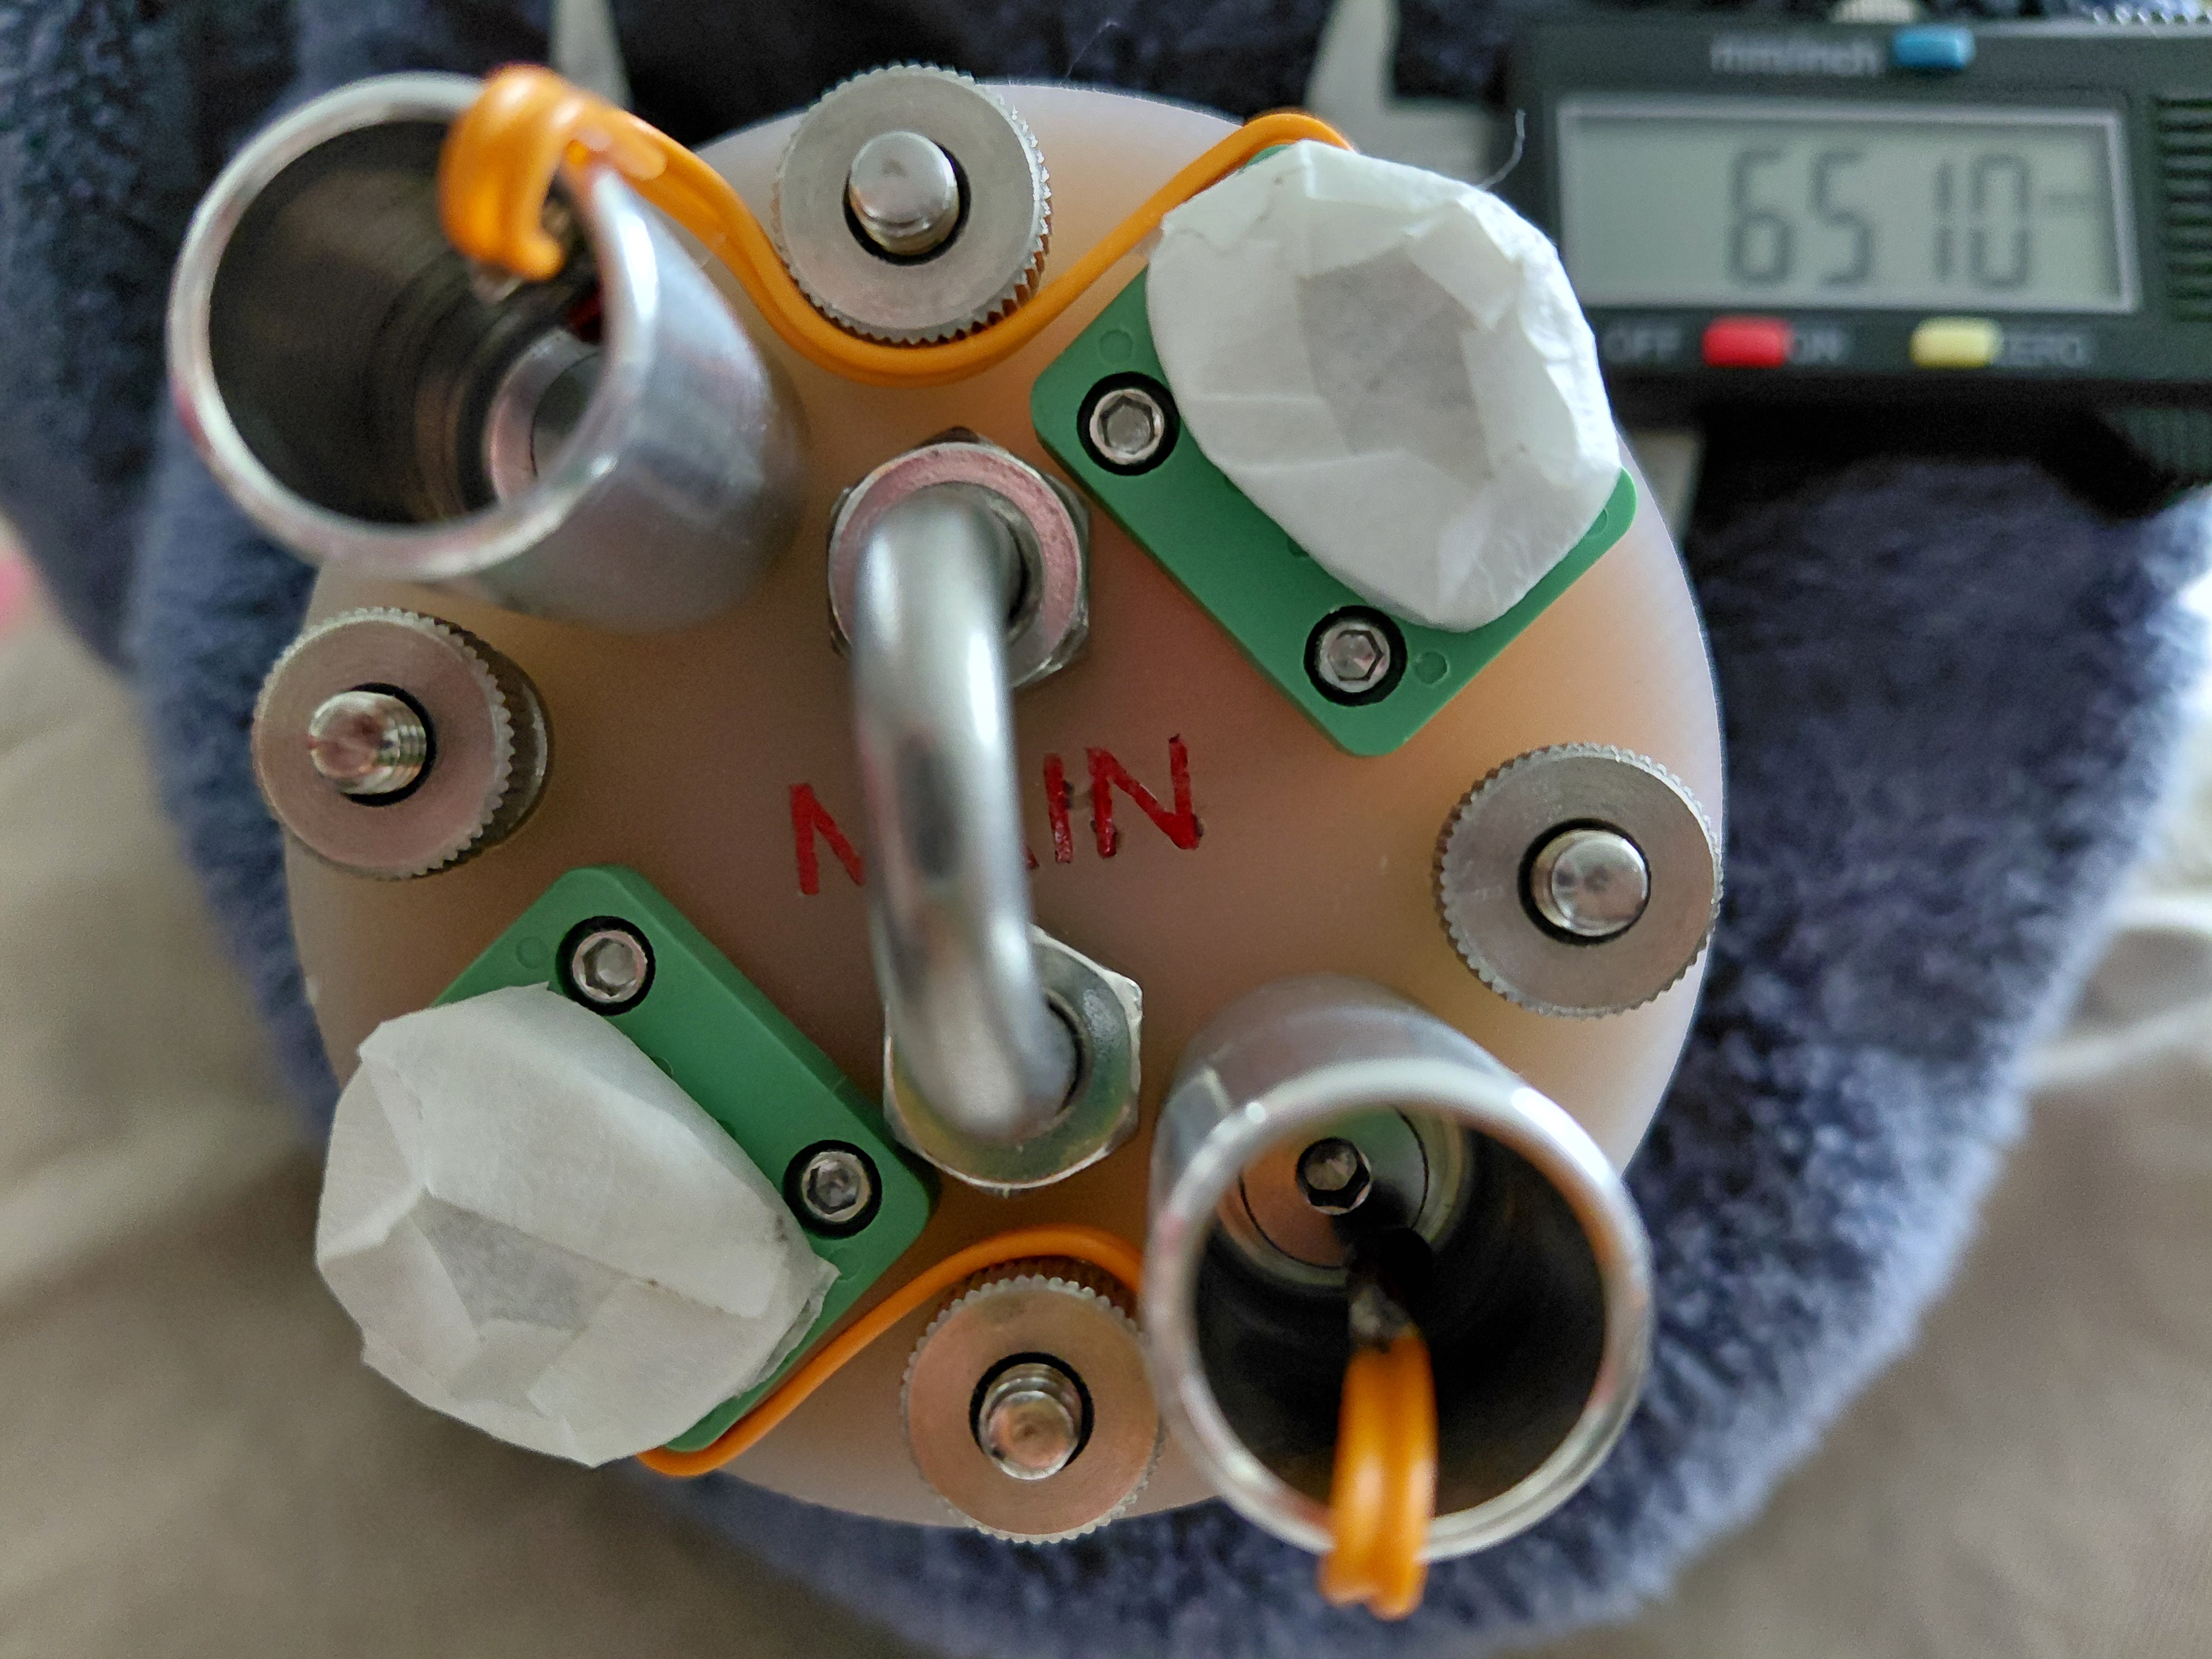
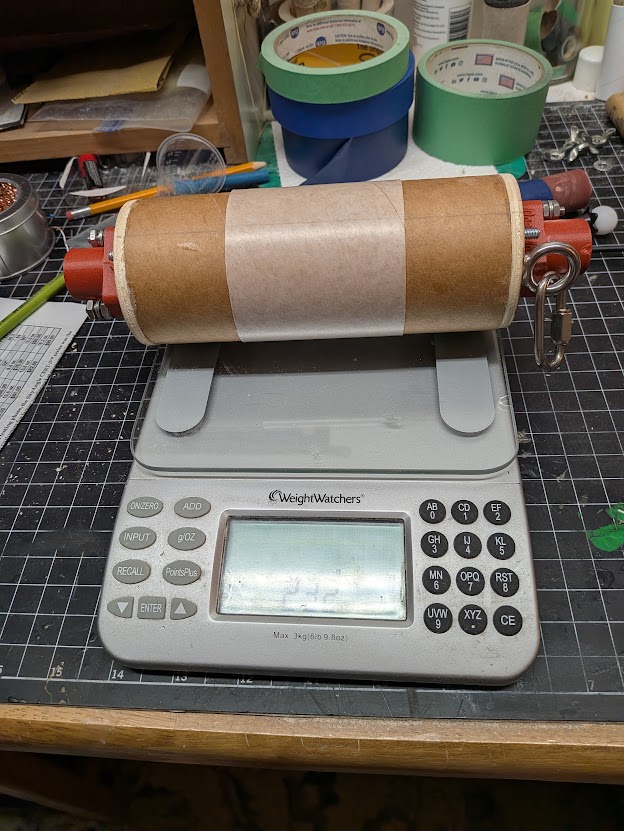
That was booster 5 last weekend... Now I am working on Booster 6. BT80 body tube, 6" e-bay. 29mm motor mount. The e-bay will have a new Eggtimer Quaser. I am surprised by the increased weight the larger e-bay. Booster 5 e-bay was BT60 x 8". with battery and hardware, it weighed 125g or 4.4 oz. The build is BT80 x 6". without the electronics is already weighs 232 g or 8.2 oz. my estimate today is 300 g making the loaded rocket weigh 1066 g or 2.35 lbs. I may have over built the sled and bulkheads, I used 1/8" ply. The hardware is 3/16 all thread and sold eye bolts and quick links, the charge wells are from One Bad Hawk.
Is my scale broken? Well, guess I won't need any nose weight. No more fishing tackle for expensive electronics. I should be able to fly it on a G80 and keep it on the field, on a calm day anyway. Next, I need to build the motor mount and fin can.
OK, so my first attempt at dual deployment (DD) was 100% successful except the main parachute appears not to have been connected to the nose cone or anything else. In fact, it was nowhere to be found. The rocket landed hard but thanks to the 6' mylar streamer it was visible to the ground. The streamer was motor deploy just past apogee. No damage to the airframe or electronics. Eggtimer Quark fired main at 500' as programed, and reported apogee of 844'. The 2 altimeters were similar. JL said 865' so I will use that for reference. I was certain when I prepped the rocket Saturday night, I had packed a 24" chute and connected it with a fishing tackle style swivel clip. The nomex wrap was tied to the same loop with kevlar thread. On the ground I found the rocket and both shock cords fully extended, nomex opened, but no parachute. Thoughts on main deployment stress factors would be appreciated.
That was booster 5 last weekend... Now I am working on Booster 6. BT80 body tube, 6" e-bay. 29mm motor mount. The e-bay will have a new Eggtimer Quaser. I am surprised by the increased weight the larger e-bay. Booster 5 e-bay was BT60 x 8". with battery and hardware, it weighed 125g or 4.4 oz. The build is BT80 x 6". without the electronics is already weighs 232 g or 8.2 oz. my estimate today is 300 g making the loaded rocket weigh 1066 g or 2.35 lbs. I may have over built the sled and bulkheads, I used 1/8" ply. The hardware is 3/16 all thread and sold eye bolts and quick links, the charge wells are from One Bad Hawk.
Is my scale broken? Well, guess I won't need any nose weight. No more fishing tackle for expensive electronics. I should be able to fly it on a G80 and keep it on the field, on a calm day anyway. Next, I need to build the motor mount and fin can.
Uploaded files: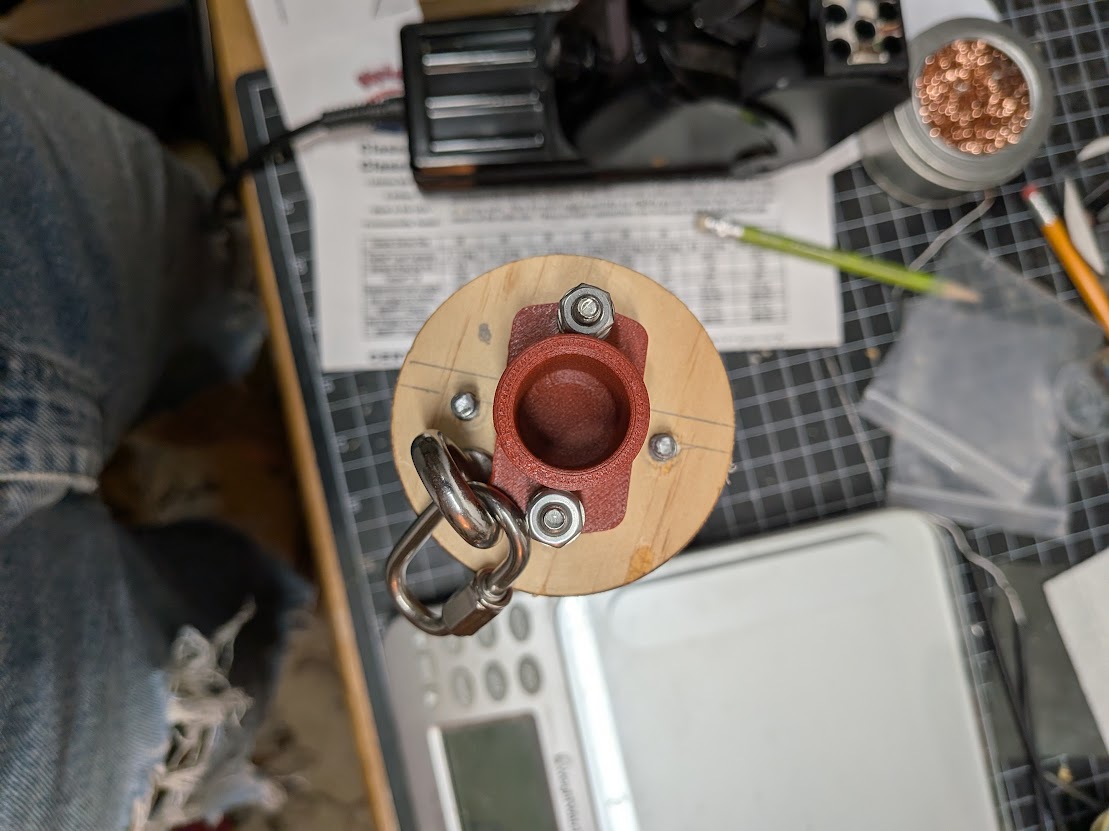

Quote from Eric Becher on August 9, 2026, 9:51 pmRe; Parachute - hard for me to guess at what went wrong since I didn't see it before launch, but you can skip the swivel all together and just attach the parachute lines directly to the shock cord or nose cone eye. Saves weight and eliminates another failure point. But sometimes that isn't a good option, so if you use a swivel, make it beefy, not the thin brass kind for small fishing. The weight limit spec needs to be a few times the weight of the rocket to account for shock loading. Off the top of my head, at least 5 times, but 10 times is better. And give it a test jerk to make sure it holds. Those things don't have a high quality control standard.
Similarly, you can eliminate the shackles (and their weight) on your e-bay by attaching the shock cord directly to the eye. Several ways to go about that. Knots, sewing, or pass the cord through the eye.
You can also use stout kevlar line to make "soft shackles" to attach shock cords and parachutes. Use a nice heavy size (not thread) to make a loop to attach your parts. When I knot kevlar, I either glue it or tape it secure. Kevlar tends to slip knots easily otherwise (low surface friction).
Those charge wells from One Bad Hawk are great! I installed them on someone else's rocket not too long ago, and the next time I need some, I'm using those.
Keep up the good work and don't get discouraged by a less than perfect recovery. As they say, we learn more from failure than from success! I'm just impressed that you are putting together the Eggtimer electronics. That's not in my wheelhouse!
Re; Parachute - hard for me to guess at what went wrong since I didn't see it before launch, but you can skip the swivel all together and just attach the parachute lines directly to the shock cord or nose cone eye. Saves weight and eliminates another failure point. But sometimes that isn't a good option, so if you use a swivel, make it beefy, not the thin brass kind for small fishing. The weight limit spec needs to be a few times the weight of the rocket to account for shock loading. Off the top of my head, at least 5 times, but 10 times is better. And give it a test jerk to make sure it holds. Those things don't have a high quality control standard.
Similarly, you can eliminate the shackles (and their weight) on your e-bay by attaching the shock cord directly to the eye. Several ways to go about that. Knots, sewing, or pass the cord through the eye.
You can also use stout kevlar line to make "soft shackles" to attach shock cords and parachutes. Use a nice heavy size (not thread) to make a loop to attach your parts. When I knot kevlar, I either glue it or tape it secure. Kevlar tends to slip knots easily otherwise (low surface friction).
Those charge wells from One Bad Hawk are great! I installed them on someone else's rocket not too long ago, and the next time I need some, I'm using those.
Keep up the good work and don't get discouraged by a less than perfect recovery. As they say, we learn more from failure than from success! I'm just impressed that you are putting together the Eggtimer electronics. That's not in my wheelhouse!

Quote from Admin on August 10, 2026, 7:48 amQuote from Eric Becher on August 9, 2026, 9:51 pmThose charge wells from One Bad Hawk are great! I installed them on someone else's rocket not too long ago, and the next time I need some, I'm using those.
Odd, I just checked the OneBadHawk.com website and there are no change wells listed there. I didn't know Teddy was selling those.
Quote from Eric Becher on August 9, 2026, 9:51 pmThose charge wells from One Bad Hawk are great! I installed them on someone else's rocket not too long ago, and the next time I need some, I'm using those.
Odd, I just checked the OneBadHawk.com website and there are no change wells listed there. I didn't know Teddy was selling those.
Quote from oliverhub on August 10, 2026, 8:25 amI bought the charge wells at LDRS in April. He offered 4g, 6g & 8g sizes with mounting hardware and wire leads. These are the 4g size. I have a pair of the larger 6g size I plan to use in my 4" Drago. They weigh 40g each.
I bought the charge wells at LDRS in April. He offered 4g, 6g & 8g sizes with mounting hardware and wire leads. These are the 4g size. I have a pair of the larger 6g size I plan to use in my 4" Drago. They weigh 40g each.
Uploaded files: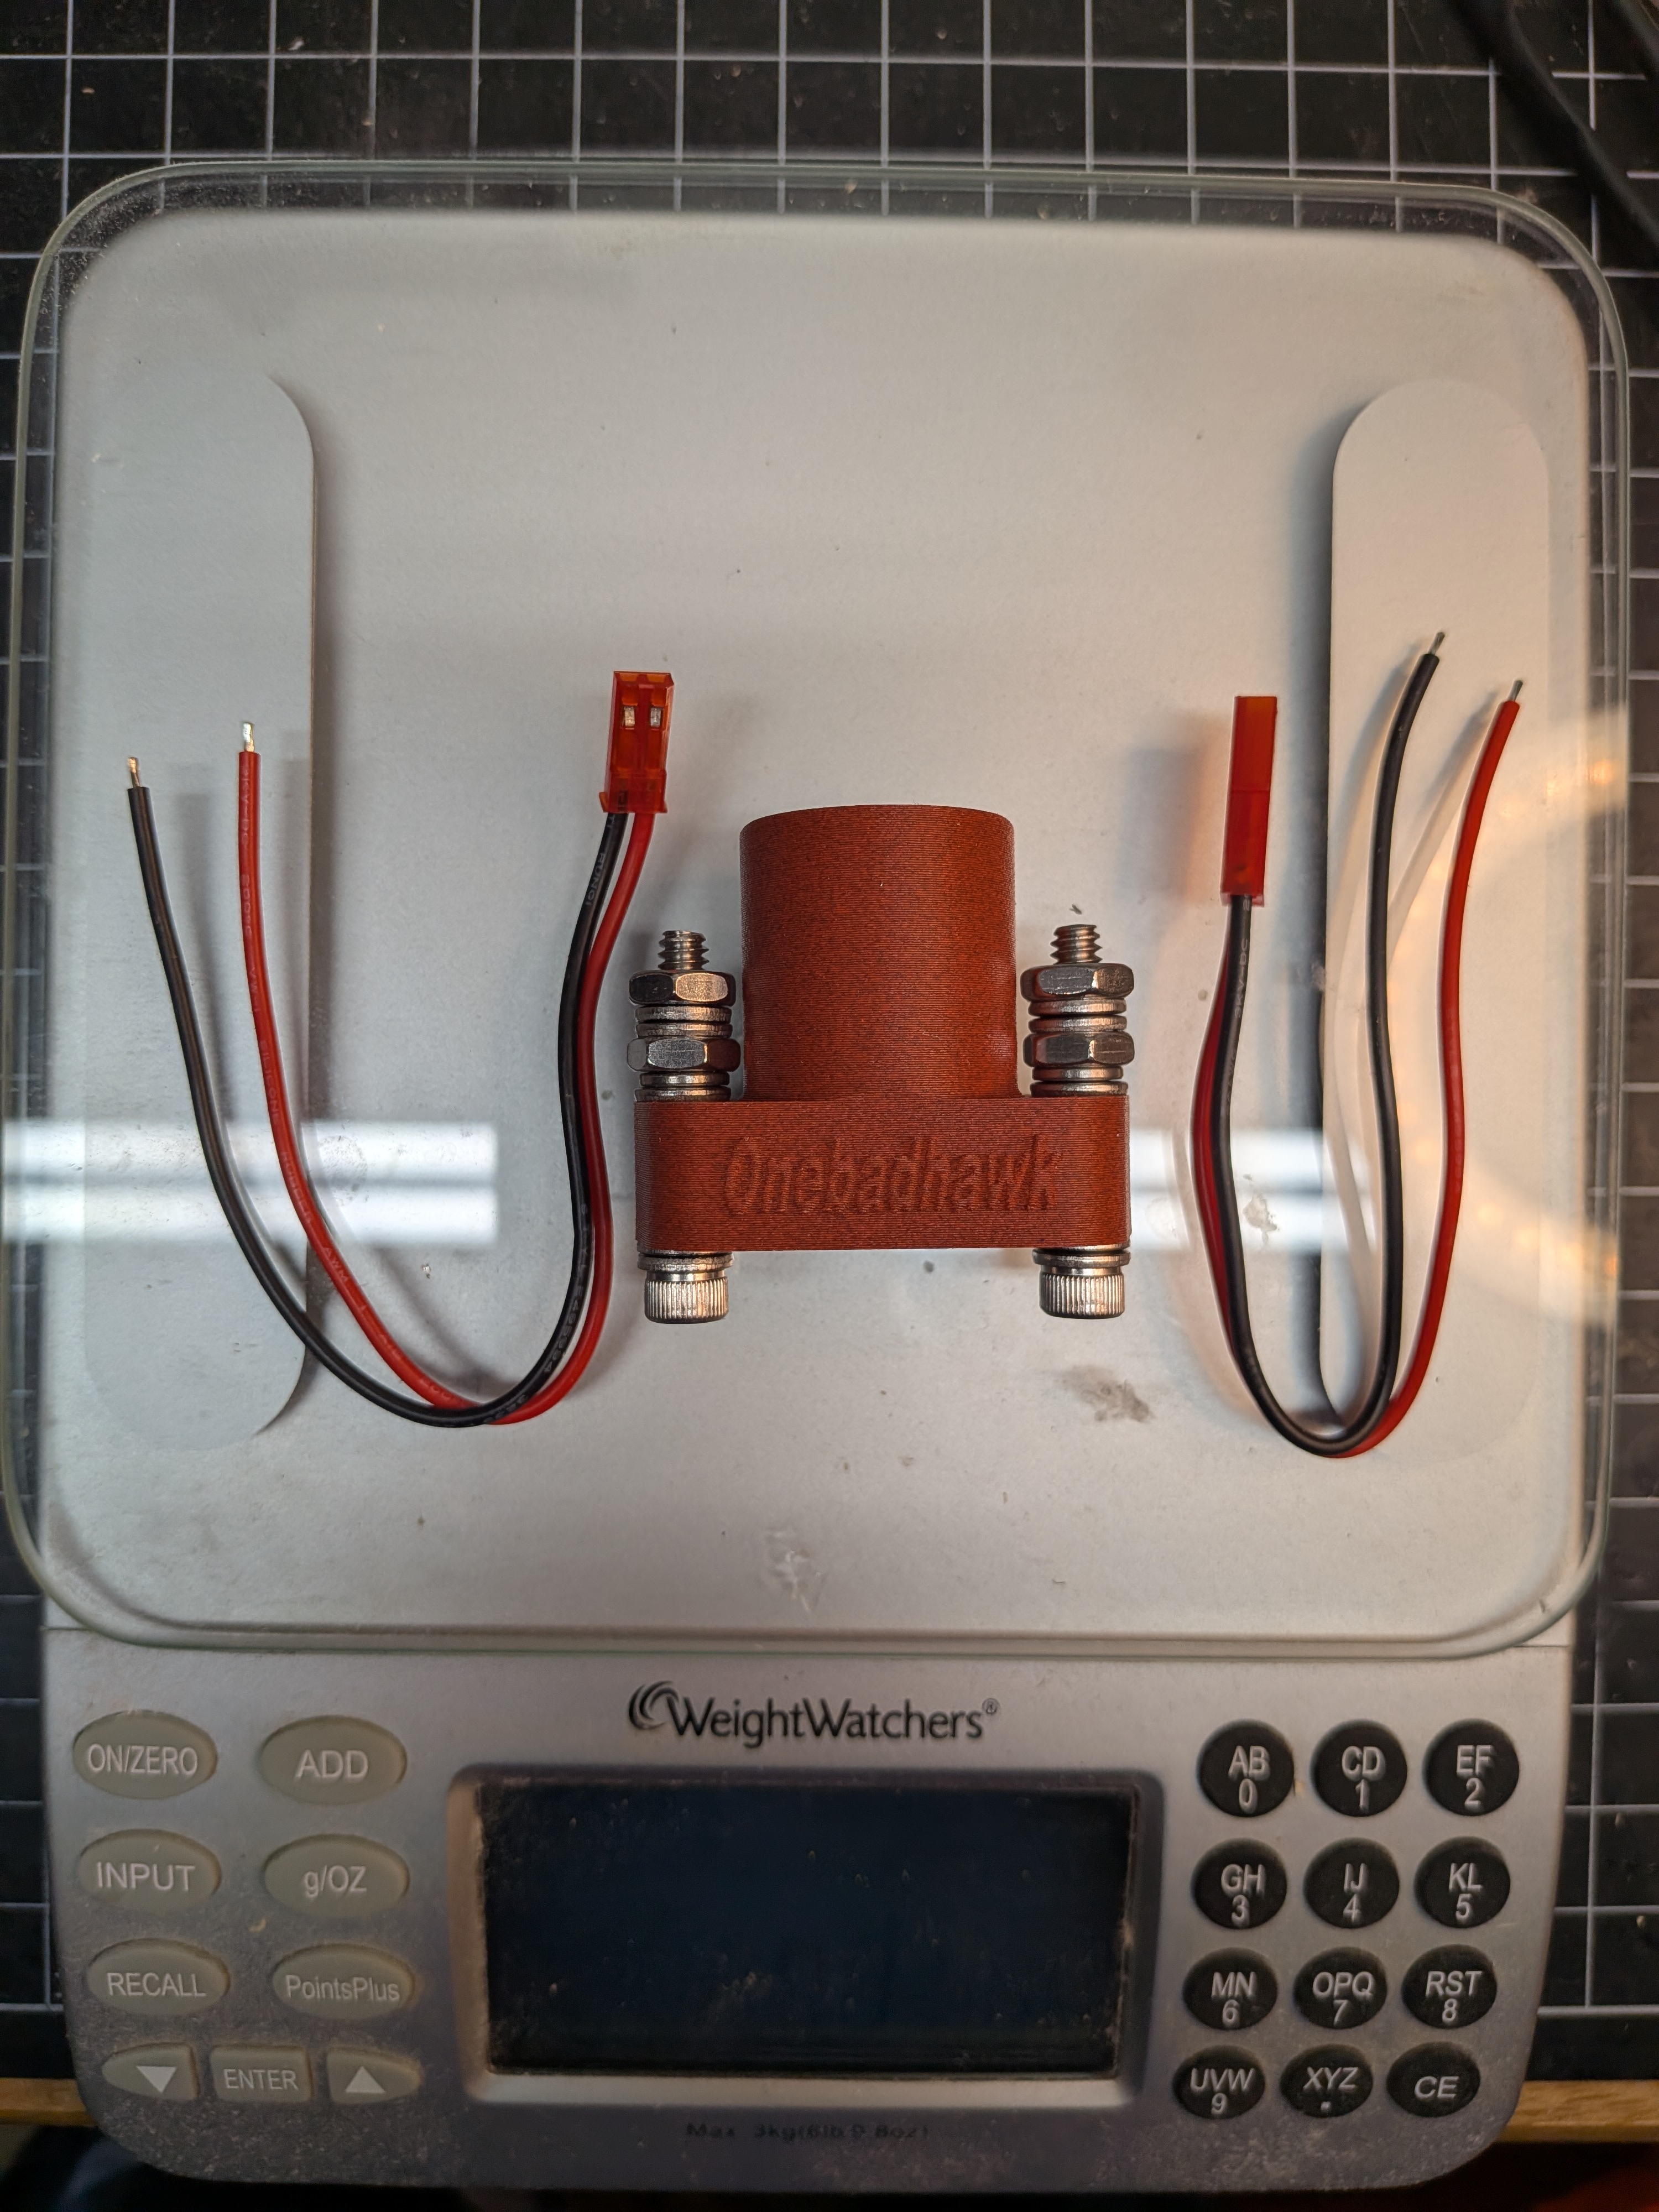
Quote from Admin on August 10, 2026, 8:44 amQuote from oliverhub on August 10, 2026, 8:25 amI bought the charge wells at LDRS in April. He offered 4g, 6g & 8g sizes with mounting hardware and wire leads. These are the 4g size. I have a pair of the larger 6g size I plan to use in my 4" Drago. They weigh 40g each.
😱 That's almost a tenth of a pound. What's he making them out of?
Quote from oliverhub on August 10, 2026, 8:25 amI bought the charge wells at LDRS in April. He offered 4g, 6g & 8g sizes with mounting hardware and wire leads. These are the 4g size. I have a pair of the larger 6g size I plan to use in my 4" Drago. They weigh 40g each.
😱 That's almost a tenth of a pound. What's he making them out of?
Quote from Eric Becher on August 10, 2026, 9:45 amThey feel like a resin of some kind, but look like molded. I assume he doesn't print them himself, but I don't know. They look overbuilt, but I'd rather that than underbuilt.
I thought he had 2g or 3g sizes too, but maybe was out of them. I thought the ones I installed on Joe's V-2 were 3g, but not sure. For the rocket Chris is building, I'd think the 4g size is much larger than needed. What will it need, 1g to 1.5g?? Aside from extra weight, and a tight fit, with a small amount of BP in a large well, you have to be careful that the igniter is in the BP sufficiently for a good burn. But you gotta use what got!
Teddy has things on his truck that are not shown on his website. His website is not great, so I would just email him what I was looking for.
They feel like a resin of some kind, but look like molded. I assume he doesn't print them himself, but I don't know. They look overbuilt, but I'd rather that than underbuilt.
I thought he had 2g or 3g sizes too, but maybe was out of them. I thought the ones I installed on Joe's V-2 were 3g, but not sure. For the rocket Chris is building, I'd think the 4g size is much larger than needed. What will it need, 1g to 1.5g?? Aside from extra weight, and a tight fit, with a small amount of BP in a large well, you have to be careful that the igniter is in the BP sufficiently for a good burn. But you gotta use what got!
Teddy has things on his truck that are not shown on his website. His website is not great, so I would just email him what I was looking for.
Quote from oliverhub on August 10, 2026, 9:52 amThey appear to be 3d printed with 100% infill. Beefy is a good adjective. Not sure what the material is, but you can carve it with a hobby knife. Weight is the enemy of altitude. I may need to go with another option for this build and use these in a heavier rocket for Booster 7.
They appear to be 3d printed with 100% infill. Beefy is a good adjective. Not sure what the material is, but you can carve it with a hobby knife. Weight is the enemy of altitude. I may need to go with another option for this build and use these in a heavier rocket for Booster 7.
Quote from Eric Becher on August 10, 2026, 10:35 amIf weight is the enemy of altitude, Altitude is the enemy of recovery (at our little field in Wall).
If you want to fly this at Wall, I wouldn't worry too much about weight, as long at what you have is in the right place.
If weight is the enemy of altitude, Altitude is the enemy of recovery (at our little field in Wall).
If you want to fly this at Wall, I wouldn't worry too much about weight, as long at what you have is in the right place.
Quote from Admin on August 10, 2026, 11:36 amQuote from Eric Becher on August 10, 2026, 9:45 amThey feel like a resin of some kind, but look like molded. I assume he doesn't print them himself, but I don't know. They look overbuilt, but I'd rather that than underbuilt.
From Chris's photo, they are most definitely 3D printed. Can't be sure of the material.
Quote from Eric Becher on August 10, 2026, 9:45 amThey feel like a resin of some kind, but look like molded. I assume he doesn't print them himself, but I don't know. They look overbuilt, but I'd rather that than underbuilt.
From Chris's photo, they are most definitely 3D printed. Can't be sure of the material.
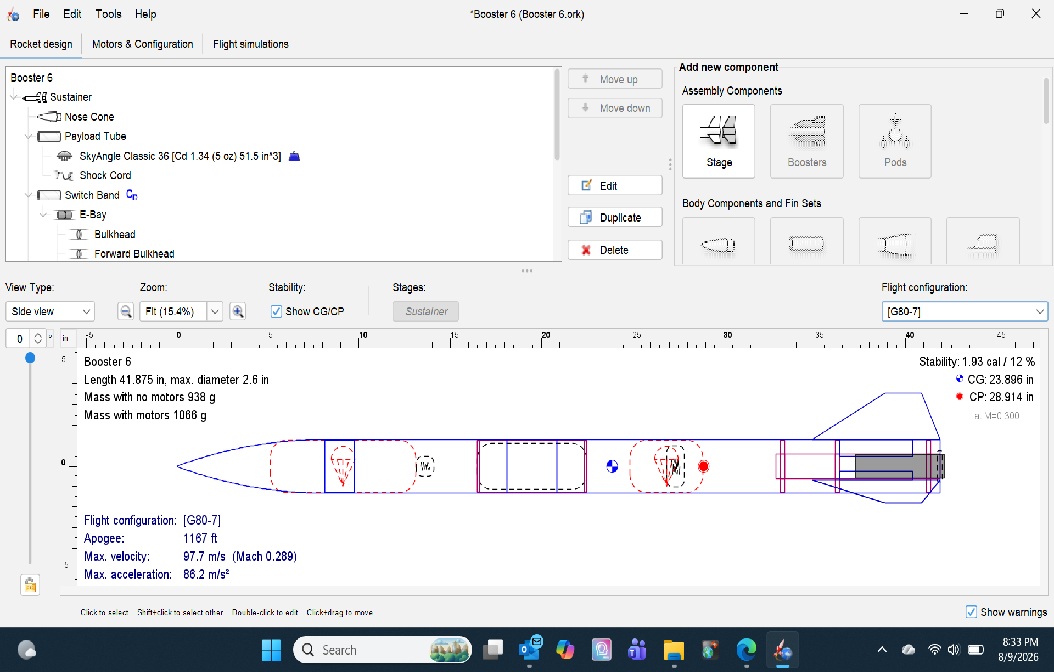
Quote from Admin on August 10, 2026, 12:22 pmChris's OpenRocket image shows that this is a 2.6inch diameter rocket. I've rebuilt the "Pringles" rocket 100% fiberglass with a 2.6inch (66mm) airframe. It's going to be high power now due to the weight using fiberglass. It's got redundant dual deployment. I was able to squeeze all of that on the av-bay bulkhead, approximately 65mm in diameter.
The charge wells are aluminum. The ones I used were from Mike Croupe (MPR — Mac Performance Rocketry). Sadly, Mike sold MPR to LOC and, alas, they no longer sell his aluminum charge wells. I used to use Rocket Junkies before they went out of business; however, Madcow Rocketry has now resurrected the Rocket Junkies brand of charge wells. RJ charge wells are very very nice. Check them out!
Chris's OpenRocket image shows that this is a 2.6inch diameter rocket. I've rebuilt the "Pringles" rocket 100% fiberglass with a 2.6inch (66mm) airframe. It's going to be high power now due to the weight using fiberglass. It's got redundant dual deployment. I was able to squeeze all of that on the av-bay bulkhead, approximately 65mm in diameter.
The charge wells are aluminum. The ones I used were from Mike Croupe (MPR — Mac Performance Rocketry). Sadly, Mike sold MPR to LOC and, alas, they no longer sell his aluminum charge wells. I used to use Rocket Junkies before they went out of business; however, Madcow Rocketry has now resurrected the Rocket Junkies brand of charge wells. RJ charge wells are very very nice. Check them out!
Uploaded files: